Showing posts with label Basic Rhinestones. Show all posts

Saturday, September 24, 2011

Raining Flowers in Calypso Coral

The other night on Global TV they were doing a special report on the Great Bear Rain Forest and the Spirit Bear.  We used to live in that area and sailed those waters.  I looked at the graphics when they were previewing the special and I saw what I wanted to use in a card - yup inspiration can come from anywhere.  The graphic was done in greens and had sort of a wavy split line between the two colours with a third colour peering out in the slit.  This is the card I came up with using the split line .....
 It took me a bit to figure out how to make the Calypso Coral cardstock the size I want and still have the split in it.  I did not want the split to be even, I wanted it smaller at the top and wider at the bottom.  So I cut the Whisper White cardstock the size I wanted. Then cut the Calypso Coral cardstock 1/4 inch bigger both ways.  Then I hand cut the slit and adhered it to the Whisper White layer and cut off the excess Calypso Coral cardstock.  Then I had to spritz it with Champagne Mist Shimmer Spritz, cuz with me it's all about the bling!!!  Here is a closer view of the flower and sentiment pieces .....
The flower is from Raining Flowers set and stamped in Calypso Coral and Basic Black and hand cut.  I used 2 different flower images.  The sentiment is done using the Decorative Label punch.  In THIS POST I showed you a really tiny punch out from the punch (and a link to Patty Bennett's blog where she has a tutorial on how to do it).  For this one I did the same thing, just used the long side of the punch instead of the short side.  Then I punched out a Wide Oval in Basic Black and hand cut it to layer the white piece.
Stamps:  Raining Flowers (page 111, Item #122765 Wood - $48.95; Item #122767 CM - $35.95), Create A Cupcake (Page 65, Item #121915 Wood - $27.95; Item #121982 CM - $19.95)
Ink:  Calypso Coral, Basic Black
Cardstock:  Whisper White, Basic Black, Calypso Coral
Other:  Decorative Label punch, Wide Oval punch, Basic Black 1/8" Taffeta Ribbon, Champagne Mist Shimmer Spritz, In Colour Printed Brad, Basic Rhinestones
   Whisper White - 8.5  x 5.5
   Basic Black - 5.25 x 4
   Whisper White - 5-1/8 x 3-7/8
   Calypso Coral - 5-3/8 x 4-1/8
Happy Stampin' .....   

Saturday, September 10, 2011

Perfect Plum Stitched Stockings CASEd card

I saw Sandi MacIver post a card on Sept 7th and I decided I would case it.  HERE is a link to Sandi's card.  And here is the card I created ....
I used the Doily Triple Layer Punch to create the right hand edge and the colours are Perfect Plum and Very Vanilla.  I made my leaves out of the Silver Glimmer Paper.  I love how Sandi used the new Vanilla Velvet Ribbon for the top of the stockings.
Stamps:  Stitched Stockings, Christmas Greetings
Ink:  Perfect Plum
Paper:  Perfect Plum Patterned DSP
Cardstock:  Perfect Plum, Very Vanilla
Other:  Doily Triple Layer punch, Stocking Builder Punch, Little Leaves Die, Silver Glimmer Paper, Basic Rhinestones, Mini Jingle Bells, Vanilla Velvet Ribbon, Lots of Tags Label #1
I used the Lots of Tags Label #1 die to cut out the layer for the sentiment.  I took a piece of Very Vanilla cardstock 1-1/4 x 5" and folded it in half.  Then I put it over the die down from one end and cut it out.  It had a bit of a bend in the middle, so I added some shimms to my big shot, put the piece between the two clear cutting mats and ran it through the Big Shot, basically squishing it.  And it "ironed" out the bend.  Too cool!  Then I mounted it on a piece of Perfect Plum cardstock and hand cut it out.
Thanks, Sandi, for the inspiration.
Happy Stampin' ............

Monday, August 22, 2011

Northern Frost Stitched Stockings Christmas Card

Hi, I'm back with my third card in the Stitched Stockings trilogy.  I pulled out the Northern Frost Embossing Folder and a retired set called Peaceful Season for the sentiment.
I never did get a chance to use this sentiment last year.  Now it is retired, but I still like it.  You could substitute any sentiment you have, if you don't have this one.
Stamps:  Stitched Stockings, Peaceful Season
Ink:  Concord Crush
Cardstock:  Whisper White, Concord Crush
Other:  Northern Frost Embossing Folder, Perfect Pennents Die, 2-1/2" Circle Punch, Basic Rhinestones, Dazzling Diamonds Glitter
Whoo hoo, I now have 3 Christmas cards done and its only August!!!
These will all be cards in my first Christmas Card Class.  Stay tuned for more info.
Happy Stampin' ... ... ...    

Friday, August 19, 2011

Punched Floral Birthday Card

A few times I've told you about the demo only magazine we receive monthly from Stampin' Up! called Stampin' Success.  It is chocker block full of inspiration and awesome ideas.  The Aug 2011 issue is no exception.  There is a scrapbook page that has lots of floral embellishments on it made using the new Lace Ribbon Border Punch.  I love to make use of my punches in other ways, and was inspired to create this card......
All the flowers have been made using Stampin' Up! punches: Lace Ribbon Border Punch, Blossom Bouquet Triple Layer Punch, 1/4", 1/2", 3/4" and 1" circle punches. I used the now retired Sweetest Stem Embosslits to make the leaves, but you could just as easily use the Little Leaves Embosslits, I just had to use this one because I haven't used it yet!
Stamps:  Very Verstatile (sentiment)
Ink:  Early Espresso
Paper:  Calypso Coral Patterns DSP
Cardstock:  Whisper White, Early Espresso, Lucky Limeade, Calypso Coral, Daffodil Delight
Other: punches listed above, Champagne Mist Shimmer Spritz (on the early espresso flower centers) Basic Rhinestones
This card was very labour intensive, but really fun to make.  A bright, happy card.
The cardstock sizes are:
  Whisper White 8.5 x 5.5 folded in half
  Early Espresso 1-5/8 x 5.5
  DSP 1.5 x 5.5
Happy Stampin' and thanks for visiting!          

Wednesday, August 10, 2011

Butterfly Easel Card

Well, we returned from our 16 day "cruise" on our sailboat safe and sound.  We had a wonderful time and now its time to get back In My Craft Room and get crafty again.
Today I have a shaped easel card to share with you.  It is made using the Beautiful Butterflies die and my Big Shot machine ... ... ...
Most of the ones I've seen out there have used different die cuts than I used.  I used the biggest butterfly (the one that you fold the cardstock over before you cut it out) and folded the cardstock in 4 so it made a really nice sized card.  Then I added the designer paper butterfly on top and put rhinestones on for the body.
It feels good to get back into crafty things again. 
Stamps:  Petite Pairs
Ink:  Marina Mist
Paper: Beyond The Garden DSP
Cardstock:  Daffodil Delight, Tangerine Tango, Whisper White
Other:  Beautiful Butterflies die, Basic Rhinestones, Scallop Oval Punch, Oval Punch
Thanks for visiting, Happy Stampin' ...........

Sunday, July 10, 2011

July Thank You cards

All of my customer who puts in an order with me in July will be receiving one of these little Thank You cards ...
I just love this new punch from Stampin' Up! called "Blossom Bouquet Triple Layer Punch".  Each colour combination I use is just so cute.
Stamps:  Bold Blossoms, So Happy For You
Ink:  Pumpkin Pie, Wild Wasabi
Cardstock:  Pumpkin Pie, Whisper white
Other:  Blossom Bouquet Triple Layer Punch, Basic Rhinestones
If you would like to get one of these great cards, just order through me (no minimum required) and I will mail one out to you.  CLICK HERE to go directly to my Online Stampin' Up! Webstore.  You can also get one by taking part in my Ribbon or Designer Series Paper Shares.  HERE is my post regarding the shares.  Make your choice, then EMAIL me.
I will be going to the Stampin' Up! Convention on Wed, Thurs, Fri and Sat of next week.  Oh I am getting so excited.  If you would like a chance to join me at convention next year, you can sign up for only $119 (Cdn) and be part of my team.  EMAIL me, or go to my Stampin' Up! WEBSITE and click on "Join The Fun" to become a member of the Stampin' Up! family and enjoy all your catalogue shopping at a discount as well as special demonstrator only perks!
Bye for now, Happy Stampin' ... ... ...

Monday, May 9, 2011

Magnolia Card - Loves Me Tilda

Every month Magnolia-Licious Highlights blog has a challenge.  I have not had the time to participate in one yet, but this month is different.  There is a sketch by Suzanne Dean this month and I created a card with the sketch and I am entering it in the challenge.
Here's my card, it uses the Magnolia image "Loves Me Tilda" ...... ..... .....

Here is an up close picture of the coloured image.  I used Copic Markers this time ....

And the flower treatment from the bottom left hand corner.  I punched, coloured and shaped the flowers by hand.
The butterfly is a "MS" punch.  I double punched it and glued it together at the body.  Then added some bling.

Another view.  You can just see the inside on this one.


This is a picture of the inside.


And an upclose view of the flowers inside the card.

I used Stampin' Up! cardstock, designer paper and basic rhinestones to creat this card.
Stamps: Magnolia - Loves Me Tilda
Ink:  Pacific Point, Tangerine Tango, Memento Black
Paper:  Beyond The Garden DSP
Cardstock:  Whisper White, Pacific Point, Wild Wasabi, Irridescent White
Other:  MS Butterfly punch, Flower punches, Whisper White Satin Ribbon, Basic Rhinestones, Fun Flowers Die, 2 Step Bird Punch
Colouring:  Copic Sketch Markers
Thanks for visiting today.  Happy Stampin' ......  

Thursday, March 24, 2011

Cupcake Happy Birthday Card

I saw this card at a recent get together at Barb Tripp's home where a bunch of us demos got together to prepare for the Vancouver Regional Seminar.  I asked Barb if I could case the card and she was graceful enough to allow me to.  Barb does not have a blog (yet!) so I can't send you that way, but she is a very talented papercrafter.  She is the one I also cased THIS card from.
This card uses the new Create A Cupcake set and Build A Cupcake Punch by Stampin' Up!  I fought cupcakes for a couple of years now, saying they were not my "style".  Ha!  Now I have the set and the punch and absolutely LOVE them both.  Check yesterday's post where I made my newest batch of Thank You cards using the set and punch.
Here is my card ........
Barb's original card used Cherry Cobbler and Love Letters DSP.  I used Mellon Mambo and the SAB designer paper Ice Cream Parlor.  I added a couple of Basic Rhinestones, because you know me, Bling is Better!
Stamps:  Create A Cupcake, Tiny Tags
Ink:  Mellon Mambo, Pretty In Pink
Paper:  Ice Cream Parlor DSP
Cardstock:  Mellon Mambo, Whisper White
Other:  Framed Tulips Embossing Folder, Build A Cupcake Punch, Jewelry Tag Punch, Basic Rhinestones, 2 Way Glue Pen, Dazzling Diamonds Glitter, Modern Label Punch, Eyelette Border Punch
Have a great day and Happy Stampin' .................... 

Saturday, March 19, 2011

Metal Sheets - Fun Flowers Card

Recently I purchased some metal sheets in some lovely colours.  Tonight I got the chance to open the package and use one of the Barn Red sheets.  Oh my it is so lovely.  I loosely followed THIS tutorial and blog post by Monica Weaver.  Monica shares lots of free tutorials and ideas for using these sheets, and she sells them as well!
Here is my creation ..............
Don't you just love it when a card comes together quickly and effortlessly?  This was one of those. 
Here is a closer view of the metal sheet flower .....
The flower is made using the Fun Flowers Die and Barn Red Metal Sheets, then there is an Antique Brad in the middle.
Stamp:  A Word For You
Ink:  Crumb Cake, Chocolate Chip, Early Espresso
Cardstock:  Basic Black, Old Olive, Very Vanilla
Paper:  First Edition Specialty DSP
Other:  Fun Flowers Die, Antique Brad, Little Leaves Die, Movers and Shapers, Modern Label Punch, Basic Rhinestones, Dimensionals, Adhesive Sheets, 2 Way Glue Pen
Thanks so much for taking time out of your day to visit my blog.  I appreciate each and every comment you leave.
Thank you to the "regulars" who never fail to leave an inspiring comment!                                                 
                                                              

Sunday, January 30, 2011

Simple Friendship meets Elegant Soiree DSP - Unscripted Sketches #91

Hi All!  I am back again after dealing with family issues and I have a new card to share with you.  I used the Unscripted Sketches #91 for the layout for this card.  When I started I had the Elegant Soiree designer series paper from Stampin' Up! pulled from my shelf as I have not used this paper in so long.  I love the comfort food feeling of the colours and designs in this paper.  Here's my card ... .... ..... ......

Stamps:  Simple Friendship,  Messages For Mom (sentiment)
Ink:  Crumb Cak, Early Espresso
Paper:  Elegant Soiree DSP
Cardstock:  Very Vanilla, Early Espresso, Baja Breeze
Other:  Early Espresso 3/8" Taffeta Ribbon, Antique Brad, Magnetic Movers and Shapers Punch Windows die, Modern Label Punch, Basic Rhinestones, dimensionals
Today my DH and I went for our usual afternoon walk and heard FROGS!!!  Spring is in the air.  As my family knows I DO NOT LIKE FROGS!  They are my fobia and make my skin crawl just listening to them.  But its nice to know spring is coming under all that fog we have been getting lately.

EDIT: A HUGE thank you to Unscripted Sketches for selecting me as one of their Top 3 for US#91.  Check out THIS blog post (scroll down to the bottom for #91 results)!

Happy Stampin', see you soon......        Glenda Mollet

Sunday, January 23, 2011

Dazzling Build A Blossom

My card for you today is based on THIS one from Gretchen Barron.   Gretchen made hers 5-1/4" square and spread it out a bit.  I wanted a regular sized card, so I rearranged things a bit.  I loved the colours she used, so I used the same ones.  Here is my card .....

I spritzed my flower with Champagne Mist Shimmer spritz before I attached it to the card.  Then I used a button from the Brights Collection (Old Olive) for the flower center.  The sentiment has a couple of Basic Rhinestones on the Modern Label punch layer.
Stamps:  Build A Blossom, Occasional Quotes
Ink:  Rich Razzleberry, Old Olive
Paper:  In Colour Patterns DSP - Blushing Bride
Cardstock:  Whisper White, Rich Razzleberry, Old Olive, Blushing Bride
Other:  Blossom Petals Punch, Modern Label Punch, Word Window Punch, Button - Brights Collection, Basic Rhinestones, Champagne Mist Shimmer Spritz, Rich Razzleberry Satin Ribbon
Have a super day!  ... ... ...   Glenda Mollet

Friday, January 21, 2011

Simple Friendship Birthday Wishes

Another card inspired / cased from Chat Wszelaki in THIS post.  I did change a few things on my card .....

My version has no ribbon, I used only one flower in the bottom left hand corner, along with some Little Leaves.  I stamped my flower in Basic Black onto Peach Parfait cardstock, then put a square of Sizzix Adhesive Sheet on top.  Then I cut out the flower, removed the liner of the adhesive sheet, and pushed it into Dazzling Diamons Glitter sticky face down.  Then I slipped a Basic Rhinestone in the center of the flower.  The flower from Friends Never Fade was stamped in varying degrees of Peach Parfait and So Saffron onto the whisper white that I cut out with my Top Note Die.  I put a bit of Diamond Stickles on the butterfly along with 6 of the row Basic Rhinestones.
Stamps:  Simple Friendship, Friends Never Fade, Elegant Cheer
Ink:  Basic Black, Peach Parfait, So Saffron
Cardstock:  Whisper White, Pear Pizzazz, Peach Parfait
Other:  Top Note Die, Diamond Stickles, Basic Rhinestones, Little Leaves die, Dazzling Diamonds Glitter, Sizzix Adhesive Sheets
Ah, another day closer to the weekend.  Not that I have to worry about that anymore.  In my life every day is a weekend day now that I am "retired"!!!  Happy Stampin'   Glenda Mollet

Thursday, January 13, 2011

Edwin With A Hat - Magnolia Card

Another colour challenge over at the Magnolia-Licioius Challenge Blog, this time the colours are Orange and Green.  I just made an orange and green Magnolia card HERE is that post, but I can't use a previously posted card, so I created another one today.  I used Edwin With A Hat and Clover Banner from the 2009 Fortune Collection......

I dug out my Island Oasis designer series paper (Stampin' Up!).  The colours in it are Pumpkin Pie and Old Olive, so those are the colours I used to colour the images on my card.  I stamped the images in StazOn black onto Stampin' Up! Watercolour Paper and used Stampin' Write Markers and an Aqua Pen to watercolour them.  This time I tried something a bit different that what I normally do, I went over the area to colour with the aqua pen first, wetting the watercolour paper a bit.  Then I dabbed on the colour with the brush end of the marker.  Then using the aqua pen I moved the colour around to where I wanted it.  I really like the results.  Here is a closer picture of Edwin, he has Star Dust Stickles on his buttons  ......


and one of the Clover Banner ......


I used Star Dust Stickles on the dots and the swirls, then Crystal Effects on the clover leaves. And this is the inside, not very fancy, but I kind of aimed this card towards masculine, the stamp is one of Yvonne Albrighton's (sorry can't find her on the net any more to provide a link), I put a Basic Rhinestone in the center of each clover leaf    ......

I loved my unexpected "snow" day today.  We had about 10 ins of snow overnight, which caused my morning class with the Sunshine Club Ladies to be cancelled.  So after some shovelling, and a walk in the snow, I created this fun and sunny card.  Thanks so much for taking time to look at my card today, I sure hope you have not been having the severe winter storms that are happening so much this year.
Bye for now. . . . . . . . .   Glenda Mollet

Tuesday, January 11, 2011

Silhouette Sentiments in Tangerine Tango

Today I have a great card for you out of an under-used colour - Tangerine Tango!  I was doing some cleaning in my cardstock drawer and came across this colour which has not had much use in my craft room.  So out it came and I created this card for you .......

I used the new Framed Tulips embossing folder by Stampin' Up!  Oh lala, this is wonderful, so many great things you can do with it.  The card is white, then a layer of Tangerine Tango, then the embossed white layer, then some more Tangerine Tango which is popped up on dimensionals, then white again where the images and the sentiment are stamped.  Some Pumpkin Pie 1-1/4" Striped Grosgrain ribbon and voila!  I used the now retired Trio Flower Punch and punched 3 flowers out of Tangerine Tango and put the largest Basic Rhinestones on the top of them.  The flowers are also popped up on dimensionals to give them a bit of pop.

Stamps:  Silhouette Sentiments (level 1 hostess gift), A Word For You
Ink:  Basic Black, Old Olive
Cardstock:  Whisper White, Tangerine Tango
Other: Trio Flower punch, Basic Rhinestones, Framed Tulips embossing folder

Thanks for stopping by, Happy Stampin'!   Glenda Mollet

Thursday, December 30, 2010

The Love Story Scrapbook Page

This page was difficult to bring together.  I used the basics from the scrapbook page on page 100 of the Stampin' Up! Main Catalogue 2010-11 and expanded it to 12x12 and added some elements.  The page is about my dear hubby, Ted, and I.  Maybe that is why it was so difficult to do!


I used some retired colours on this page because those are the colours in my bouquet and Ted's shirt.  Cameo Coral, Apricot Appeal and Groovy Guava.  Nothing says 1975 like different shades of orange!  The stamp sets are Flower Fancy (a two step stampin' set) and Priceless.  I have had both of these sets forever and use them all the time.  The flowers and leaves are all hand cut, the leaves are popped up on dimensionals, and the flowers have Basic Rhinestones (the small ones on the left), Basic Pearls (the big ones) and Clear Rhinestone Brads (the small flowers on the right).  The tags are from the Basket and Blooms die for the Big Shot.
I wanted to do some journalling, but did not want it to clutter up the page too much, so I created journalling space under the tags on the right hand side.  I used the clear rhinestone brads to hook them together and they act as a swivel to open the top tag and expose the journalling.


Then I dug out one of my two left over invitations.  Yup you know you are a scrapbooker at heart when you have saved the Wedding Invitation for 34-1/2 years!  Too funny.  I hid it under the picture.  I just popped the picture up on dimensionals around where the invitation slips in.  Then put a tiny part of another tag on the top to pull it out.


 I used the Newsprint Designer Series Paper for the background and spritzed it with Cameo Coral, Apricot Appeal, So Saffron and Old Olive markers using the Colour Spritzer tool.  Then I used my Basic Black Stampin' Write Marker and inked up the word Love on the "Peace Love Joy" stamp from the "All Holidays" stamp set, and stamped it in the title at the top of the page.

The cardstock is Naturals Ivory and it goes quite good with the Newsprint DSP as it is Basic Black and Very Vanilla.
Thanks for stopping by, remember tomorrow night Don't Drink And Drive when you party the new year in.
Glenda Mollet

Tuesday, December 28, 2010

Because I Care - CASEd card

Hello everyone, I am back again with yet another CASEd card.  This one I received as sa thank you card from a fellow demonstrator on Vancouver Island - Lisa (Rankin) Gray.  I do not know if Lisa has a blog, but want to acknowledge her super work.
I used some Basic Rhinestones on my version, but basically the rest is the same.  The hydrangea image is stamped on Very Vanilla in Early Espresso ink, then ran through the Big Shot with the Vintage Wallpaper embossing folder.  I did ink the edges of the very vanilla piece before I put it through the folder.  The butterfly is cut out from the Beautiful Butterflies die, then I stamped the Baroque Motif stamp in VersaMark and added clear embossing powder.  Then Marina Mist ink was sponged all over the butterfly, and wiped with a bit of Windex to take the ink residue off the embossing.  6 Basic Rhinestones were added for the body.  This is actually quite a quick card to make.  I hope you have had some time to do some serious crafting in your craft room this holiday season.  I have been having such fun casing cards from blogs, friend's cards, and the main catalogue as well.  I have also created a few of my own.  I will share these with you over the next few days.  Bye for now ... ... ...  Glenda Mollet

Sunday, December 26, 2010

Secret Tilda - Magnolia Card

The town we live in, Port Alberni, BC, is a very foggy part of the world during the winter.  So I set out to make a happy, sunny card using Secret Tilda, Fairytale Background, and Two Tulips.  I dug out my stash of retired Stampin' Up! Kaleidoscope Designer Series Paper and created this card .......


I used the Mojo Monday 170 sketch for this card.  I stamped Secret Tilda first on Stampin' Up! Watercolour Paper using Basic Black Classic Ink, then masked her and stamped the Fairytale Background over top.  The Two Tulips stamp was stamped on a separate piece of WC paper and cut out after colouring. I coloured the scene with my Stampin' Write Markers and an Aqua Pen.  Kaleidoscope DSP has some retired colours in it, so I had to dig out my retired markers.  I also used Gable Green cardstock and the Little Leaves Die to make the leaves behind the Two Tulips. The fluffy clouds have some Liquid Applique on them.
Here is a close up picture of Secret Tilda ......

and a close up view of the entire scene .........


This is a picture of the tulips I stamped on the envelope and the left hand side of the card  ......


And finally a look at the inside of the card.  I used a nestability to make the frame thing around the area for writing, and added a couple of Basic Rhinestones for some bling.  Then I hand cut out some flowers from the DSP, and put some Basic Pearls on them.  I cut the DSP so it looks like a sunburst ...... 


 I have so much fun creating this little gems, and over the holiday season I hope to get more done.  I get to let my creativity flow and use lots of items on them.  I know most of the products I used on this card is Stampin' Up!, but I did try to add some non SU flowers and ribbon and trinkets, but it just did not look right.  Maybe next time!
I hope your Christmas was awesome yesterday, and today you get a chance to rest and relax now that it is all over for another year.  Yummy leftover turkey sandwiches mean NO COOKING today!
Happy Stampin', thanks for visiting ...........  Glenda Mollet

Saturday, December 25, 2010

Morning Cup - Mojo Monday 169

Merry Christmas Everyone!  Ho Ho Ho .... .... ....
When I saw this week's 
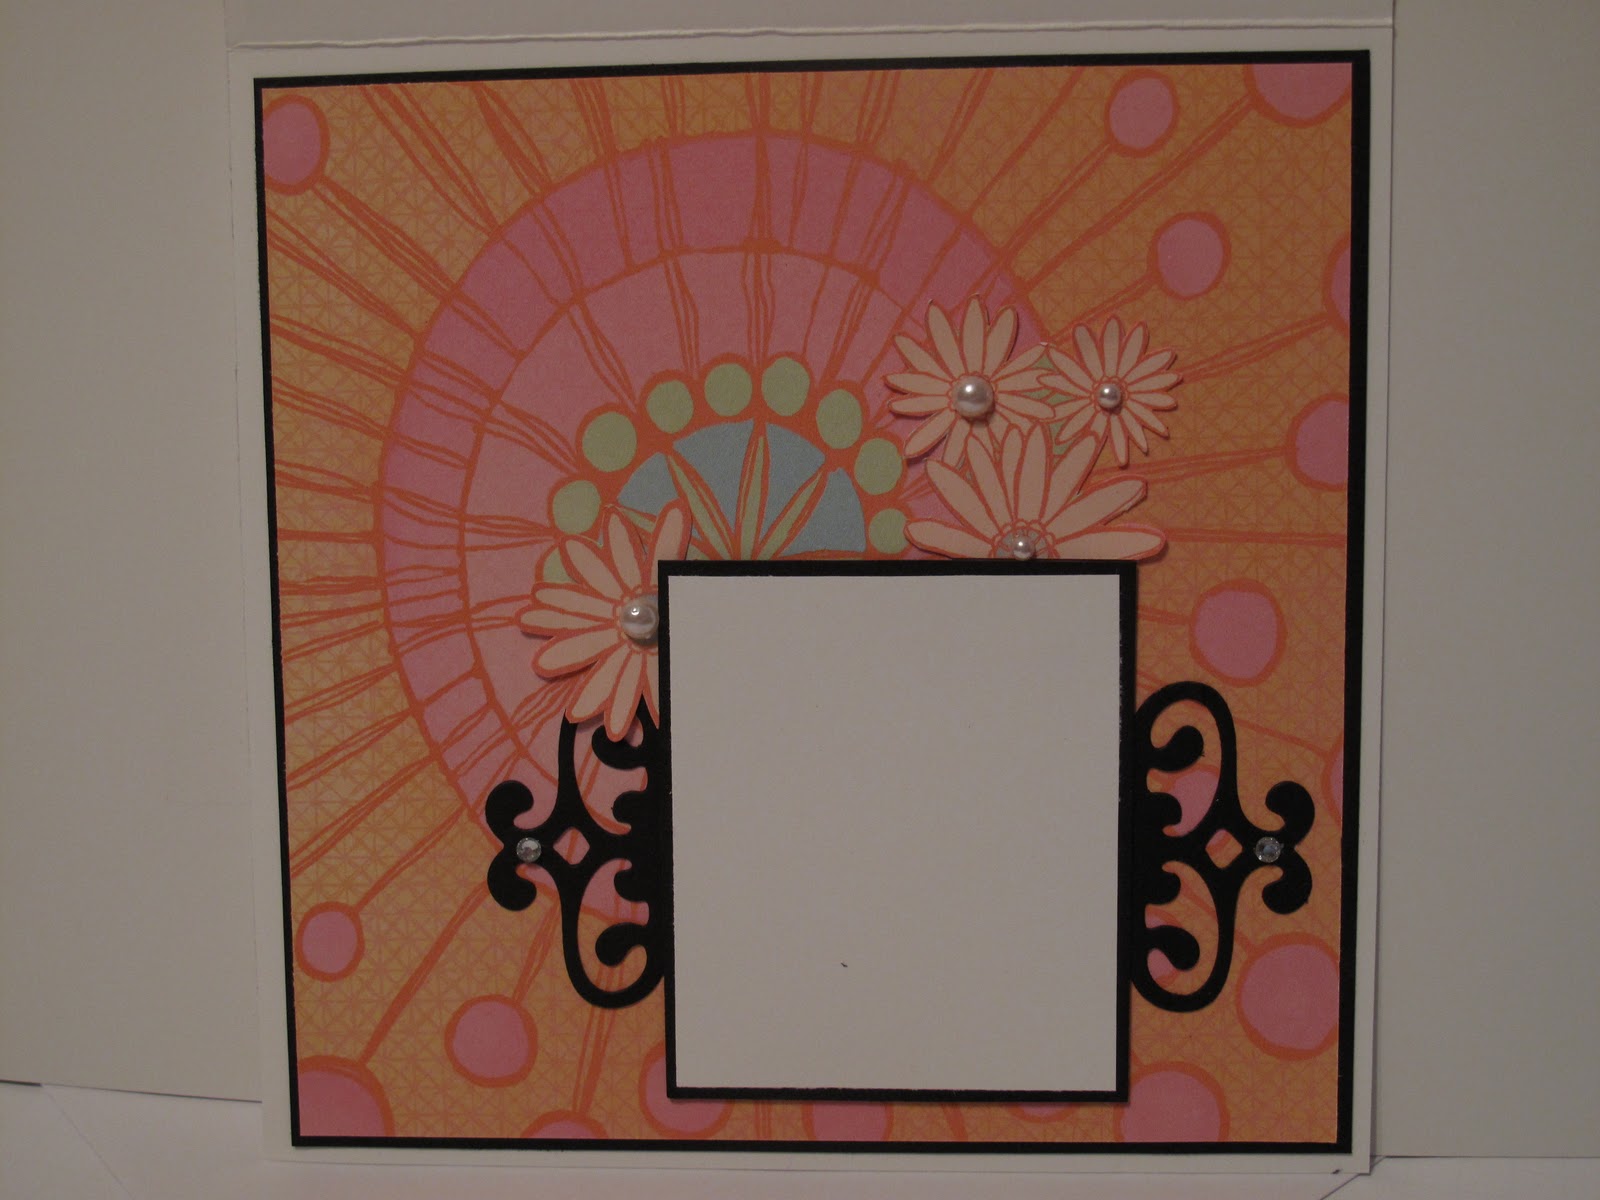
Mojo Monday 169 sketch, I knew I had to create something with it.  I recently got the Stampin' Up! set "Morning Cup".  I know, I know, what took me so long.  Well I am basically a "floral" card maker, but all at once this set hit me and I had to order it.  It is really fun to create cards with it.  I made my December Thank You cards out of it as well.  Here is the Thank You card I created . . . .


I bought the wheel, Take A Sip, as well and had a lot of fun using it too.   And here is the card .. ... ....

I used my very favourite designer series paper, Elegant Soiree!  This paper is like comfort food to my eyes.  To create the scalloped corners on the DSP, I used the Scallop Circle Punch, then added Basic Rhinestones on the curves.  I did a watercolour technique on the stamped images with Stampin' Write Markers and an Aqua Pen.
Here is the recipe for this card (all Stampin' Up!):
Stamps - Morning Cup, Occasional Quotes
Ink - Basic Black
Markers - Baja Breeze, Crumb Cake, Early Espresso, Daffodil Delight, Old Olive
Paper - Elegant Soiree DSP, Very Vanilla, Early Espresso, Watercolour Paper
Other - Aqua Pen, Marina Mist Taffeta Ribbon, Basic Rhinestones, Dimensionals, Scallop Circle Punch, 1-3/8" Circle Punch, Corner Rounder Punch
Season' Greetings to you and your family, and I hope all is well in your corner of the world!
Glenda Mollet

Friday, December 24, 2010

Just Believe Brayered Card - CASEd Card Share

This is the last one of my CASEd cards for now.  This is CASEd from Gretchen Barron, another very talented lady.  I love brayering, which this card uses.  I love clean and simple, which this card is, and I LOVE rhinestones and bling of any kind, which I made this card have!

I used almost the same colours as Gretchen, but I changed the Pretty In Pink to Pink Pirouette to make it a bit softer.  I added Basic Rhinestones to the butterfly body and made antennas for him as well.  I also added a sentiment to the bottom, and omitted the ribbon.  My Just Believe floral images are stamped in Early Espresso instead of Chocolate Chip.  So I used the same colour scheme, just used a couple of different colours.  When making this card, make sure you ink your floral images really, really well so you get good coverage and solid stamped images (yup learned this by the hard way!).
Happy Christmas Eve, everyone!  I hope your day is fabulous tomorrow, and Santa is good to each and every one of you.  I appreciate you taking time out of your busy schedules to visit my blog!
Glenda Mollet

Monday, December 13, 2010

Lip Balm Holder #2

This is the very last craft fair item, I PROMISE!!!  The craft fair is over and it was a great success.  Thank you to everyone who dropped by.  Oh my the baking was out of this world.  Sitting all day looking at it for two whole days was a bit of a bear, but I manaaged!
Here is the last Lip Balm Holder I made ......
I used Jolly Holiday DSP, Basic Rhinestones and Very Vanilla Taffeta Ribbon.  The tree image comes from Season Of Joy.  I inked my stamp with VersaMark, then Cherry Cobbler Classic Ink (at the same time, it does not affect your Cherry Cobbler Classic Pad at al!).  Then dipped it in Irridescent Ice Embossing Powder and used my Heat Gun. Oh My Goodness, or as Robin would say to Batman, "Holy Bling Batman!!!).  It was so gorgeous.  A few Basic Rhinestones just finished off the blingy effect.  The sentiment is from Merry Chrittermas.
Well, that's it for craft fair stuff.  I am hoping to get some crafty time in during the next couple of weeks and will share with you when I do.  But my posting will be sporatic as we get ready for Christmas.  I have gift wrapping to do today, after I seriously clean my house.
Bye for now, thanks so much for taking the time to visit my blog.  Happy Stampin'   Glenda Mollet

LinkWithin

Related Posts with Thumbnails