Showing posts with label Bigger Cards. Show all posts

Tuesday, January 25, 2011

Christmas All Year Long - Magnolia Blog Hop - January 2011

Welcome to the very first Christmas All Year Long blog hop of 2011, showcasing Magnolia stamps.
If you have arrived from Danielle Champagne's blog, you are on the right track.  If not hop back to the Magnlia-Licious Christmas All Year Long blog and start at the beginning.  You don't want to miss a single one of these awesome cards.
Here's my submission for the blog hop - Snowy Hugs .....


I used all Stampin' Up! cardstock, designer series papers, ribbon, and markers to colour the image.  The DSP is retired as is the Sage Shadow cardstock.  Here is a list of what I used, including a colouring list:
Stamps:  Snowy Hugs - Magnolia stamp, Stampin' Up! sentiment
Ink:  StazOn Black, Sage Shadow
Paper:  Wintergreen DSP (retired)
Cardstock:  Sage Shadow (retired), Always Artichoke, Watercolour paper, Whisper White
Other:  MS Snowflake punch, SU XL Tag and Lg Tag punches, My Minds Eye Lucious Rhinestones, Liquid Applique (snow on trees), White Flocking (fur on hats and coat), Stampin' Up! White Organza and White Organdy ribbon, Dazzling Diamonds Glitter, Star Dust Stickles
Colouring:  Stampin' Write Markers, Aqua Painter
Colours:  Trees - Mellow Moss; bench - Cajun Craze, Going Gray; Coat - Real Red, Bravo Burgundy; Pants - Brocade Blue; Snowy - Bashful Blue; Buttons - Early Espresso; Boots - Basic Gray, Going Gray; Mitts - Going Gray; Face - Blush Blossom, Pretty In Pink; Broom - Close To Cocoa, Chocolate Chip; Hair - Daffodil Delight, So Saffron, Close To Cocoa; Sky - Ballet Blue; Path - Cramy Caramel, Close To Cocoa; Rocks - Close To Cocoa; Light Post - Basic Gray, Summer Sun

I hope you are enjoying our Blog Hop, your next stop is Jessica Hammond.  Hop on over to see her awesome creation.  Thanks for visiting, have a super duper day!!  Glenda Mollet


Monday, January 24, 2011

Build A Blossom Poppy Card

In THIS post Lee Conrey shared her awesome card with us.  When I saw this card I fell in love with its simplicity, and I knew I had to use the layout.  I used the same layout and the same stamp set - Build A Blossom, but I changed the colour and the embossing.  Here's my version .....

I used Poppy Parade and Wild Wasabi, two more of those under used colours in my cardstock drawer.  Red is NOT my favourite colour, but I think it works on this card.  I used the Perfect Polka Dot embossing folder for the first embossed layer.  This card is 5-1/2 x 5-1/2" square, so I had to run the cardstock through the embossing folder, then move it and align the dots up and run the last bit through.  It worked really well, I just used a bit of Dotto adhesive to hold it in the embossing folder so it did not move.  Then I used the new Framed Tulips Embossing Folder and the tutorial on THIS post by Sharon Field to make a frame around 3-7/8 x 3-7/8" piece of Whisper White cardstock.  The flower petals are stamped in Poppy Parade, and the center is Wild Wasabi.
Stamps:  Build A Blossom, Sincere Salutations
Ink:  Poppy Parade, Wild Wasabi
Cardstock:  Whisper White, Poppy Parade
Other:  Blossom Petals Punch, 1" and 1/2" circle punches, Perfect Polka Dots and Framed Tulips Embossing Folders
Bye for now, thanks for visiting!    Glenda Mollet

Wednesday, January 19, 2011

Tilda With A Small Gift - Magnolia Card

Boy, oh Boy did I have super fun making this card!!!  I let my imagination go, and pulled out all those hoarded items I have not wanted to use.  This card is no particular challenge, just a "because I wanted to" card.  Almost everything is double matted, making this card very, very thick.  It has 14 layers of cardstock and designer paper on the front.  Here you go ......

Here is an upclose view of the pearl swirl in the top left hand corner ....


This is a pearl swirl called "Say it In Pearls" by Prima.  It is a big long one, and I just cut it up and used part on the front, and part inside (picture later) and still have some left for later.  It also comes with 3 acrylic roses, I used 2 on the front along with some hangy pearl things that I have had forever .....


I used my Copic Markers to colour Tilda (list below of what I used if you are interested).  I added some teeny tiny Basic Pearls by Stampin' Up! on her dress and her bows.  Here is a closer view of her ....


I used a Gardenia Patch flower I got from Magnolia-Licious and added some leaves in Always Artichoke and Whisper White using a MS punch ....


Here are pictures of the inside of the card, which I also decorated ......

and the side where the writing goes, I used another piece of the swirly pearls ......


Well there you go, my very first totally Magnolia card.  I sure had fun making it, but doing this post was another thing entirely!!  Blogspot must have been having issues. 
Here are the Copics I used to colour Tilda With A Small Present:
     Dress:  R81, R83, R85
     Bows:  R83, R85
     Socks: R0000, R81
     Shoes: R0000, R000
     Soles: W3
     Present: R83, R85, R0000
     Tag: W3, W00
     Lace: nothing
     Skin: E000, E11, E00
     Cheeks: R20, E000
     Shadow: R00
Thanks for visiting, Happy Stampin'  .....   Glenda Mollet

Thursday, January 13, 2011

Edwin With A Hat - Magnolia Card

Another colour challenge over at the Magnolia-Licioius Challenge Blog, this time the colours are Orange and Green.  I just made an orange and green Magnolia card HERE is that post, but I can't use a previously posted card, so I created another one today.  I used Edwin With A Hat and Clover Banner from the 2009 Fortune Collection......

I dug out my Island Oasis designer series paper (Stampin' Up!).  The colours in it are Pumpkin Pie and Old Olive, so those are the colours I used to colour the images on my card.  I stamped the images in StazOn black onto Stampin' Up! Watercolour Paper and used Stampin' Write Markers and an Aqua Pen to watercolour them.  This time I tried something a bit different that what I normally do, I went over the area to colour with the aqua pen first, wetting the watercolour paper a bit.  Then I dabbed on the colour with the brush end of the marker.  Then using the aqua pen I moved the colour around to where I wanted it.  I really like the results.  Here is a closer picture of Edwin, he has Star Dust Stickles on his buttons  ......


and one of the Clover Banner ......


I used Star Dust Stickles on the dots and the swirls, then Crystal Effects on the clover leaves. And this is the inside, not very fancy, but I kind of aimed this card towards masculine, the stamp is one of Yvonne Albrighton's (sorry can't find her on the net any more to provide a link), I put a Basic Rhinestone in the center of each clover leaf    ......

I loved my unexpected "snow" day today.  We had about 10 ins of snow overnight, which caused my morning class with the Sunshine Club Ladies to be cancelled.  So after some shovelling, and a walk in the snow, I created this fun and sunny card.  Thanks so much for taking time to look at my card today, I sure hope you have not been having the severe winter storms that are happening so much this year.
Bye for now. . . . . . . . .   Glenda Mollet

Saturday, January 8, 2011

Magnolia Card - Tilda (new) - Mojo Monday 172

Ahhhh, I had such wonderful time creating this card.  I love it when I get time to create a card just because.  I wanted to make a card for this week's Mojo Monday Sketch Challenge 172.  I love these sketches, they work so well with all different kinds of cards.  Here is the card I made this week .... .... .... ....

This is one of the new Magnolia stamps that I got recently.  This Tilda is not even released yet so I don't know her name.  She is one of the cutest ones so far, tho.  I love the balloon.  I stamped her with half of Open Gate from the 2010 Hoppy Easter Collection.  When I got this stamp, I cut it in half so I could use it singly, or spread it apart further.  Here is a different view .......

You can see a bit of the 3D effect I did on the flowers that are growing up the fence.  I stamped the 3 open buds again on watercolour paper, coloured them and popped them up on dimensionals.  Then I added a teeny, tiny pearl to the center of each one.....


I punched a piece of Orchid Opulence cardstock with a MS punch (the latticey one) then slipped a piece of Old Olive cardstock behind the lattice part.  Then I ran some Old Olive 1-1/4" Striped Grosgrain Ribbon around the card.  Tilda was stamped on watercolour paper using StazOn black ink, then I coloured her with Stampin' Up! Markers and an Aqua Pen using a watercolour technique.  Then it was time to cut her out. I used the "out of the box" technique and the largest round nestability.  The black circle was cut using my Circle Cutter Plus.  Here is a closer view of Tilda .....


I used a mixture of companies for the supplies for this card.
Stamps:  Magnolia - Tilda (new), Stampin' Up! Happy Birthday from Messages For Mom
Ink:  StazOn Black
Designer Paper:  Stampin' Up! Cottage Wall (retired)
Cardstock:  All Stampin' Up! - Naturals White, Old Olive, Rich Razzleberry, Orchid Opulence (retired), Basic Black, Watercolour paper
Other:  Punch - Martha Stewart: Lattice; Punches - Stampin' Up!: Modern Label, Movers and Shapers Die, Circle Cutter; Nestabilities - largest circle. Old Olive 1-1/4" Grosgrain Ribbon, Crystal Effects, Basic Pearls, dollar store rhinestones
Colouring: Stampin' Write Markers, Aqua Pen and Watercolour Paper (all Stampin' Up!)
I also did a bit of 3D-ing on the inside. I stamped the Old Olive swirl on Naturals White cardstock, then stamped the flowers in Orchid Opulence and Rich Razzleberry (stamped off once), cut them out and popped them up on dimensionals.  A few Basic Rhinestones were applied to the middle of each flower.......


There you go, another Magnolia creation!  Now I can't wait to get some birthdays so I can start to give these little sweethearts away.  This one will be my Maggie Monday class card in March, so she will be around a bit yet.  If you want to come and create this card, just email me and we can make arrangements.
Bye for now ... ... ...  Glenda Mollet

Wednesday, December 29, 2010

Magnolia Card - Honey Tilda - Mojo Monday #171

A special treat today, two posts!  This one is my entry for the Mojo Monday 171 sketch.  I coloured this image of Honey Tilda with Copic markers.

I used Stampin' Up! cardstock - Whisper White, Chocolate Chip, Pear Pizzazz and Pumpkin Pie, and Designer Series Paper - Greenhouse Gala.  Tilda is "sitting" on a nestability, I used the "out of the box" technique of cutting out her legs and inserting the nestie die in behind her before I cut out the cardstock.  It looks like she is sitting on the cut out image.  Then I framed it with another nestie cut out of Chocoate Chip.    The leaves are Pear Pizzazz and I punched them with the Stampin' Up! 2 Step Bird Punch, the flower is one I picked up at Wallyworld a while ago.  I stamped Homey Tilda on Stampin' Up! Whisper White cardstock with Memento Tuxedo Black ink, then coloured her in the following Copics:
     Hat: YR07, YR04, YR02
     Clothes: YR07, YR04, YR02, YR0000
     Socks: YR02, YR0000
     Heart Antennas: YR07, YR04, YR0000
     Skin: E13, E11, D00
     Hair: E25, E31, E50
     Cheeks: R21, R20
     Wings: Y11, Y0000, Diamond Stickles
Here is a closer picture of Tilda ....
Do you see the purple ladybug on her leg?  Well, I had an "oops" with a marker when I was going around the outside of her legs after I cut them out, and it slipped and there you go, a ladybug is placed on her leg!  I looked for a red one, but this is the only colour I could find, so it had to do.
Here is the inside, not as decorated as a lot of them are, but more than I usually do ......
It is another piece of Greenhouse Gala DSP, some more leaves from the bird punch this time in Daffodil Delight, and some Whisper White ones from the Little Leaves die.  The cute little bee is from "Just Buzzin' Bye" a Stampin' Up! set.
Thanks for visiting, I hope you enjoyed both posts today!  Glenda Mollet
Sunday, December 26, 2010

Secret Tilda - Magnolia Card

The town we live in, Port Alberni, BC, is a very foggy part of the world during the winter.  So I set out to make a happy, sunny card using Secret Tilda, Fairytale Background, and Two Tulips.  I dug out my stash of retired Stampin' Up! Kaleidoscope Designer Series Paper and created this card .......


I used the Mojo Monday 170 sketch for this card.  I stamped Secret Tilda first on Stampin' Up! Watercolour Paper using Basic Black Classic Ink, then masked her and stamped the Fairytale Background over top.  The Two Tulips stamp was stamped on a separate piece of WC paper and cut out after colouring. I coloured the scene with my Stampin' Write Markers and an Aqua Pen.  Kaleidoscope DSP has some retired colours in it, so I had to dig out my retired markers.  I also used Gable Green cardstock and the Little Leaves Die to make the leaves behind the Two Tulips. The fluffy clouds have some Liquid Applique on them.
Here is a close up picture of Secret Tilda ......

and a close up view of the entire scene .........


This is a picture of the tulips I stamped on the envelope and the left hand side of the card  ......


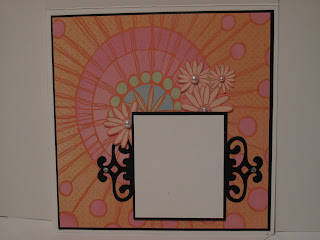
And finally a look at the inside of the card.  I used a nestability to make the frame thing around the area for writing, and added a couple of Basic Rhinestones for some bling.  Then I hand cut out some flowers from the DSP, and put some Basic Pearls on them.  I cut the DSP so it looks like a sunburst ...... 


 I have so much fun creating this little gems, and over the holiday season I hope to get more done.  I get to let my creativity flow and use lots of items on them.  I know most of the products I used on this card is Stampin' Up!, but I did try to add some non SU flowers and ribbon and trinkets, but it just did not look right.  Maybe next time!
I hope your Christmas was awesome yesterday, and today you get a chance to rest and relax now that it is all over for another year.  Yummy leftover turkey sandwiches mean NO COOKING today!
Happy Stampin', thanks for visiting ...........  Glenda Mollet

Monday, September 13, 2010

Season Of Joy - Cherry Cobbler - Deck The Halls DSP

I used the new Stampin' Up! Deck The Halls Designer Series Paper for this quick and easy card.  The colours of the DSP are Cherry Cobbler, Always Artichoke and Very Vanilla, so those are the colours I used on this card.  Here it is ... ... ...
I stamped the tree from Season Of Joy three times in Always Artichoke on Very Vanilla cardstock, hand cut them out, and attached 2 flat on the card, and popped the middle one up on dimensionals.  The sentiment, from Curly Cute, is stamped in Basic Black on Cherry Cobbler and matted in Always Artichoke.  The ribbon and bow is actually the new Stampin' Up! Always Artichoke Seam Binding.  Hah! no bling on this one, can't believe it!!!!
Thanks so much for visiting today and I hope you have a great week.
... ... ... ... ...   Glenda Mollet    ... ... ... ... ...

Sunday, September 5, 2010

Just Believe - Concord Crush and Bashful Blue

I have a card for you today that I made for Mojo Monday 154 sketch.  I am showcasing the Stampin' Up! stamp set "Just Believe" in one of my card classes in October, so this is what I came up with for one of the cards.....

The colours are Bashful Blue, Concord Crush and Whisper White.  I also just had to add some Basic Rhinestones.  I am sooooo happy that Stampin' Up! added these, and the Basic Pearls, to the product line.  I use them all the time now, just can't get away from them.
Thanks for looking, I hope you get a chance to do the Mojo Monday sketches, they are awesome.
Bye for now......  Glenda Mollet

Thursday, August 19, 2010

Magnolia Card - Noble Tilda on Traveller Luggage

This card is coloured on Stampin' Up! Watercolour Paper, using Stampin' Write Markers and an Aqua Pen.  I wanted to experiment with a different way to colour my Magnolia stamps so I can create a class or two with them, and keep the price of the class quite low.  This is the card I came up with......
I started with some Watercolour Paper, then stamped Nobel Tilda in Stampin' Up! Basic Black Classic Ink.  I do not have my StazOn ink with me, so had to make do, and this works really well for Watercolouring.  Then I masked Tilda and stamped the Traveller Luggage "behind" with Basic Black ink.  I coloured the images in by putting a small amount of colour in the area I wanted with Stampin' Write Markers, then using the Aqua Pen, I moved the colour around and painted the image in.
When that was all done, I created the card using Stampin' Up! Cardstock, Designer Series Paper, Punches, Stamps and Embellishments.
Here is a list of ingredients for you: (all Stampin' Up! unless noted)
Stamps:  Magnolia - Noble Tilda and Traveller Luggage; Stampin' Up! - Silhouette Sentiments and Lots of Thoughts
Paper:  Elegant Soiree Designer Series Paper
Cardstock:  Very Vanilla, Baja Breeze, Soft Suede, Watercolour paper
Ink:  Baja Breeze, Soft Suede
Markers:  Blush Blossom, Soft Suede, Baja Breeze, Melon Mambo, Old Olive, Crumb Cake, Basic Gray, Daffodil Delight
Other:  Aqua Painter, Basic Pearls, 1-1/4 and 1-3/8 square punches, Dotted Scallop Ribbon Border punch

On the inside I did something a bit different with the Dotted Scallop Ribbon Border Punch......
I punched all around the outside of a piece of Very Vanilla cardstock, leaving just enough inbetween to hold it all together.  Then using Baja Breeze and Crumb Cake inks, I stamped some flower images from the Hostess set Silhouette Sentiments.
I will be doing a tutorial on how to do this in my next post.  If you are interested in it, I would love you to revisit soon.
Thanks, hope your week has been good, almost the weekend now.  It's hot and sunny where I am right now.  We have moved to Quadra Island just off the coast of Campbell River on Vancouver Island.  This island is so popular even Oprah and Barbara Streisand visit here (no they are not here right now,boohoo). 
Bye for now.....................  Glenda Mollet

Monday, July 12, 2010

Midsummer Tilda (Magnolia Card)

I coloured some more Magnolia images yesterday, and got this card created this morning.  I wanted to use only Magnolia images, and not any other flowers.  This is what I came up with.......
I used some retired designer paper that was a level 3 Hostess Reward from last Stampin' Up! catalogue called Lovely Flowers, and layered it on Whisper White cardbase with Rich Razzleberry cardstock.  I used Copic Markers (list to follow) to colour MidsummerTilda, Fantasy Flower and Tulips.  I cut out the images, and cut off the swirls at the top of the Fantasy Flowers as they were too long to fit on my cardfront where I wanted them.  Then I reapplied them down a bit further on the flower heads.  The background scallop circle piece is made with Stampin' Up! Whisper White cardstock that I brayered some hills on with Old Olive.  Then I punched out a small scallop circle and used it as a template to sponge Bashful Blue onto the cardstock for clouds.  Tilda and all of the flower heads are popped up on Dimensionals.  Then I applied some bling (of course, heehee).  The pink heart shaped ones on the Fantasy Flower swirls, and the pearl heart shaped ones on Tilda's crinolin are from Dollarama, the big one on top of the Boho Blossom punch in Regal Rose is from Lush.  I added some SU Whisper White Satin ribbon to the top right hand corner to balance the whole thing.  I used my Always Artichoke Stampin' Write marker to draw some grass tufts on the brayered hills.  Tilda's dress has white polka dots on it from the Sharpie white pen.
Here is a picture of the inside......
I used the other side of the designer paper for the inside, then cutout the largest of the Circles,Scallop #2 die and my Big Shot machine.  I applied another Fantasy Flower inside, this one I did not cut off the swirl.
Here is a list of the Copic Markers I used:
Skin ~ E0000, E00, E11, E13
Dress ~ Y0000, Y11, Y13, White Sharpie Pen
Hair ~  Y11, Y21, E97, Y0000
Hair Flowers and Headband ~ V0000, V12, V15, V06
Flowers
Pink Ones ~ RV0000, RV32, RV13, RV14
Yellow Ones ~ Y0000, Y13, Y17
Purple Ones ~ V0000, V12, V15, V06
Stems and Leaves ~ G0000, G21, G63, G67
I hope your day is an awesome one, Happy Stampin'......  Glenda Mollet

Thursday, July 8, 2010

Christmas All Year Long -Sneak Peek

Every month on the 25th, Magnolia-licious Highlights blog has a "Christmas All Year Long" blog hop.  This is a sneak peek of the card I created for the July blog hop....
This card uses the images Sparkling Tilda, Poinsettias and Holly Letter.  It is coloured with Copic Markers and uses Stampin' Up! cardstock and designer papers.  The colours are Cherry Cobbler and Always Artichoke.  I hand cut a lot of Poinsettias and added them to the card along with lots of Bling!!  Come back on July 25th and see the rest of the card.... just to tease you a bit.
Bye for now, off to enjoy Alert Bay some more...............  Glenda Mollet

Wednesday, July 7, 2010

Pretty Pink Elements Of Style

This card is one of those that hit you at an odd moment, then just won't leave you alone until you go and create it.  It took on a life of its own!  I was sitting at the top of Cormorant Island, BC in the community of Alert Bay enjoying reading a Diana Gabeldon book "Voyager" in the sunshine. This card popped into my head, and I had to go in right away and create it, I could not even finish my page, it kept bugging me!!!  So, to make a long story short, here is a picture of the card.............
The supplies I used to create this jem were:
Stamps:  Elements Of Style
Ink:  Early Espresso, Pink Pirouette, Pretty In Pink, Regal Rose
Markers:  Pink Pirouette, Pretty In Pink, Regal Rose, Pear Pizazz and Always Artichoke
Cardstock:  Whisper White, Pretty In Pink, Pink Pirouette, Regal Rose
Punches:  Eyelette Border, 1-3/8 circle, 1-1/4 circle, 1 circle
Other:  Dimensionals
I sponged some Pink Pirouette ink all around the stamped image, but left the area where the image itself is white, then I added some Pretty In Pink around the outside and Regal Rose just to the very edge.  I did not bring my crimper with me to make the paper lace along the bottom, so I had to score it every 1/8 to 1/4 inch then pleat it.  I think it turned out ok.  The Regal Rose strip of Eyelette Border punch along the bottom is actually the inside of the card.  Here is a close up of the strips of punching at the bottom....

Here are a couple of pictures of where we are at the moment.  DH is working, and so am I, and that is my story and I am sticking to it!!!!
Our trailer set up in the campground.....
and the view from up at the top of the island from our big window at the back of the trailer.....
Yesterday we walked along the boardwalk and into the village of Alert Bay, I took these pictures....
If you ever get the chance to visit this truly charming little village, please do not hesitate to do so.  Right at the top of the island is an Ecological Reserve and there is miles and miles of inter-twining paths you can walk.  They will take you all over the entire island, and some of it is on a boardwalk over a bog.  Oh my, its so awesome that even Oprah (yes THE Oprah) comes here.
Thanks for visiting, this blog is a bit longer, but I hope it was worth it!  Bye for now, I'll be back tomorrow with a sneak peek of a card I made for the Magnolia-Licious Hightlights blog "Christmas All Year Long" blog hop that happens on the 25th of every month!.........  Glenda Mollet

Tuesday, May 25, 2010

Wrapped Tilda card - Magnolia-licious DT Challenge

Update:  Reposting this for the May Magnolia-Licious Christmas All Year Long Blog Hop, I hope you enjoy all the hops.  If you arrived from Deb's fabulous blog, you are on the right track, if not go back to the beginning HERE and visit all of the stops on the hop. Here is my submission.....

I got to colour another Magnolia image a few days ago, so I decided to follow May's Magnolia-lious DT Challenge, AND make it completely white except for the image.  My friend Candy gave me the most awesome birthday card (here is a link to her posting of that card) and it was all white, except for the image.  It was so striking, that I just had to do the same.  It was really fun, and no fussing to find out matching cardstock, copic colours, designer papers and embellishments!  Everything was white!  Here's my card:
I used my Elegant Bouquet Embossing Folder by Stampin' Up! on some Whisper White cardstock.  Then I cut out around it and used it for the corners.  This paper was then spritzed with the new Smooch Spritzes available now.  I used Vanilla Shimmer.  OMG it is gorgeous IRL!  I love this Magnolia Tilda image, she is so cute.  This card uses all Stampin' Up! products except for the image, the copics I used to colour her, and the Stickles - Star Dust.  Here is what I used:
Cardstock:  Whisper White
Punches:  5 Petal, Boho Blossom
Other:  Elegant Bouquet and Square Lattice embossing folders, half pears from Pretties Kit, Smooch Spritz - Vanilla Shimmer, Whisper White Satin Ribbon
The flower in the bottom LH corner is 2 5 petal punches and 2 boho blossom punches, then they are smooched and crumpled and shaped, then smooched again.  It has a half pearl inside it.  The flowers on the other two corners are just cut outs leftover from when I cut out the Elegant Bouquet embossing folder, they are also smooched.
Here is a picture of the shimmer from the Smooching..... Oh My isn't it gorgeous????
And here is a picture of Tilda and the letter up close:


I used a lot of sparkle on this card between the Smooching and the Stickling....
Here is a list of the Copic Markers I used:
Skin:  E0000, E000, E00, E11
Cheeks:  R30, R20, R21
Hair:  W3, W5, W9
Dress:  G0000, G09, G14, G24, G21
Dress Trim:  W00
Socks:  G0000, G21, Blender Pen
Bow:  R0000, R24, R27, R29
Berries:  R0000, R27, R29
Holly:  G0000, G21, YG63, YG67
Letter:  W00, W1
Shadow:  W1

The next stop on the Christmas All Year Long May Blog Hop is Jessica Hammond,  Have an awesome day!
Now for a bit of wisdom from my favouite daytime soapie - The Young And The Restless. 
Yesterday is History
Tomorrow is a Mystery
Today is a Gift, that's why its called the Present!
Thanks for looking, and I hope your weekend is simply Marvelous!  Happy Mother's Day to all the Mom's out there.  Enjoy Life!    *********  Glenda Mollet

Friday, May 14, 2010

Spring Song - Mojo Monday #138

I created this card for this week's Mojo Monday Sketch Challenge.  HERE is the link to that sketch.
Here is my card ..............
For this card I used:
Stamps:  Spring Song, Very Versatile
Ink:  Basic Black and Perfect Plum
Markers:  Mellow Moss, Always Artichoke, Old Olive, Perfect Plum, Lovely Lilac, Ruby Red, Apricot Appeal, Going Gray
Paper:  Shades of Spring DSP
Cardstock:  Very Vanilla, Perfect Plum
Other:  Large Oval, Small Oval, Itty Bitty Flower and 1/4" Circle Punches
I really like this sketch, but then I like most of the Mojo Monday sketches, they are quite easy to use and are adaptable too.
Thanks for looking, I'll be back soon.
~*~*~*~*~*~*~* Glenda Mollet


Sunday, April 11, 2010

Honey Tilda - Magnolia Card

My last day on the beach in Tofino for a week or so.  Last night I created this card using my "Honey Tilda" Magnolia stamp.  This is another image I coloured a while ago and I am just getting around to making the card.  I have 2 more pre-coloured images yet to find homes for.  This card did not end up being anything like the one in my head - weird how that happens to me a lot!!  The sketch is one of the weekly sketch challenges, but for the life of me I can't remember which one.....sorry.  But enjoy the card anyways.........
The background paper is Bridesmaid Specialty DSP from Stampin' Up!  It starts out Very Vanilla, then I sponged some Summer Sun on it, then More Mustard and finally Soft Suede.  The non coloured areas you see is the shiny part of the DSP which does not hold the colour when sponged.  It's super IRL.  I layered the big BG paper onto Soft Suede c/s then onto the Very Vanilla card base.  The three strips are the same DSP sponged the same way but with more of the Summer Sun showing, and also layered onto Summer Sun then Soft Suede c/s.  I used some MS half pearls and some KaiserScrapbook half pearls.  The flowers are two sizes of Marvy Daisy punches with some MS half pearls in th ecenters.  Honey Tilda is sitting on a strip of Summer Sun c/s punched with the new Pinking Hearts Border Punch by Stampin' Up! which is layered onto a strip of Soft Suede to mimic a table.  Tilda and the table are popped up on dimensionals.  I coloured some Whisper White Organza ribbon with Summer Sun Classic ink and wrapped it around the cardfront under the flowers.  The most time consuming part of this card was the sponging.
Here's the inside which I did do this time........
and here is a close up of the flower detail:

If you know which sketch this belongs to, I would appreciate a mention of it in the comment section so I can give it proper credit.  Sometimes I just sketch the sketch into a book I have and usually I write down what sketch it was, but I was interrupted when I was doing this and did not go back to finish.
Thanks for visiting my blog, I appreciate all your comments!   * * * Glenda Mollet

LinkWithin

Related Posts with Thumbnails