Showing posts with label Mojo Monday Challenge. Show all posts

Tuesday, November 22, 2011

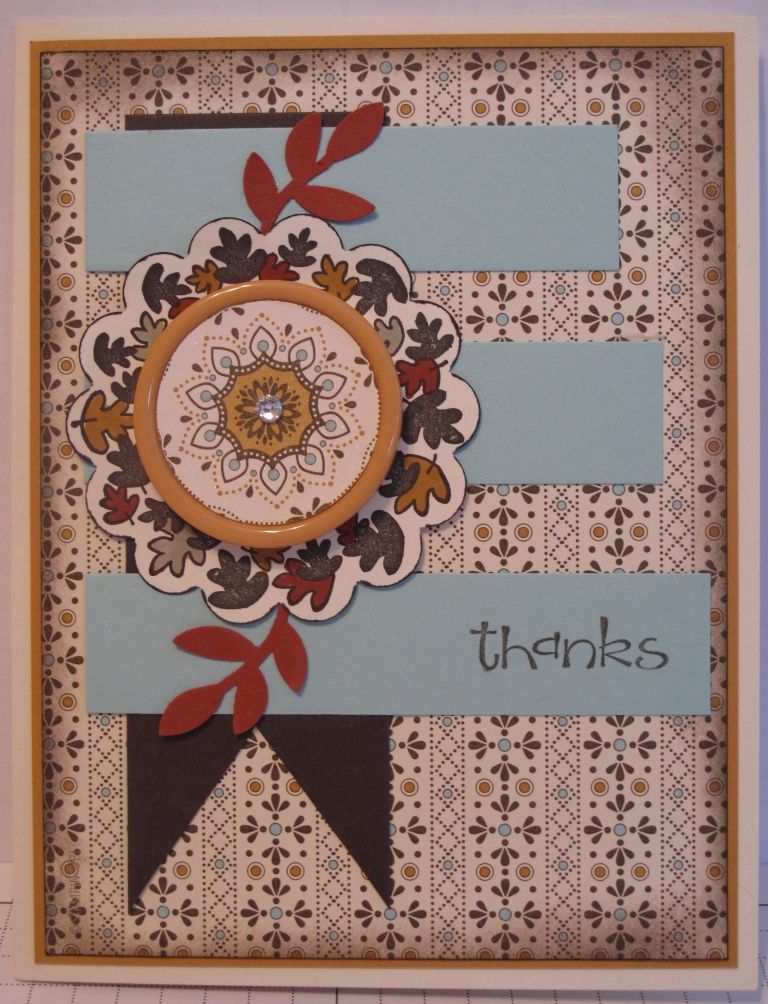
Spice Cake Thank You - Mojo Monday 216

I had a chance, this week, to use the Mojo Monday Sketch #216.  Here is the card I came up with ....


Stamps:  Warmest Of Wishes, So Happy For You
Ink:  Early Espresso
Markers:  More Mustard, Cajun Craze, Crumb Cake, Early Espresso
Paper:  Spice Cake DSP
Cardstock:  Very Vanilla, More Mustard, Early Espresso, Pool Party, Cajun Craze
Other:  2-3/8" Scallop Circle, 1-1/4" Circle, Bird Builder punches, Spice Cake Designer Buttons, Basic Rhinestone, Champagne Mist Shimmer Spritz
Happy Stampin' .....

Tuesday, October 4, 2011

Mojo Monday #209 Birthday Card

Yesterday Mojo Monday posted a great sketch, click HERE to get the sketch for yourself.  I pulled out my Spice Cake Designer Series Paper and came up with this card ...
 I added a whole bunch of bling with my Champagne Mist Shimmer Spritz .....
Between the texture added by the different Embossing Folders and the bling from the spritz this card is one you just have to touch!
Stamps:  Happiest Birthday Wishes
Ink:  Soft Suede, Riding Hood Red
Paper: Spice Cake DSP
Cardstock:  Very Vanilla, Pool Party, Soft Suede
Other:  Scallop Edge Punch, Stripes Embossing Folder, Vintage Wallpaper Embossing Folder, 2-3/8" Scallop Circle Punch, Scallop Circle Punch, 1-3/8" Circle Punch, Very Vanilla Satin Ribbon
Happy Stampin' ......      

Thursday, July 7, 2011

Beary Happy Birthday

Today I used an old Mojo Monday sketch #194.  I know it is past the date I can add my creation to all the awesome cards that were submitted, but I loved this sketch and saved it till I had time and the idea to use it.
I pulled out a stamp set that I seldom use, but is still current, and added the new Perfect Pennants Die.
Stamps:  Beary Best Friends, A Word For You
Ink:  Basic Black, Whisper White craft
Paper:  Regal Rose DSP Patterns Pack
Cardstock:  Whisper White, Concord Crush
Other:  Perfect Pennants die, 1-3/4" Circle, 1-3/8" Circle, 1-1/4" Circle punches, Whisper White 3/8" Taffeta Ribbon
Have fun today, and Happy Stampin' ~ ~ ~

Saturday, May 7, 2011

Fabulous Florets - Mojo Monday #189

This weeks Mojo Monday sketch is a great one!  HERE is the link to that post.  I really wanted to do a card using this sketch, and today I finally got the chance.
I pulled out my new "stuff" from the Summer Mini Catalogue - Fabulous Florets stamp set and Beyond The Garden Designer Paper and White Baker's Twine.  I followed the sketch, but used my "creativity" for the piece where the sketch has the strip with the brads on it.  This did not fit the theme of my card, so I used the smaller flower and leaf images from the Fabulous Florets stamp set and ran them off to the right hand side.  For the "brads" I used some Dazzling Diamonds Glitter on the images.  Here it is up closer for you .... 
Stamps:  Fabulous Florets, Build A Cupcake (sentiment)
Ink:  Wild Wasabi, Pacific Point
Paper:  Beyond The Garden DSP
Cardstock:  Whisper White, Wild Wasabi, Melon Mambo
Other:  Finial Press Embossing folder, Scallop Border Punch, XL Oval Punch,Word Window Punch, 1/16" Punch, Dazzling Diamonds Glitter, 2 Way Glue Pen, White Baker's Twine
Today in West Kelowna, BC, the weather has been awesome.  I have been able to leave the trailer windows open and do some sitting outside in the sun on the sandy beach.  We are located right be low the Mission Hills Winery which has a 12 storey bell tower.  Today we have been so lucky to have heard the bells ringing more than half a dozen times.  It is truly magical!
Thanks for visiting, I hope you have a super weekend.
Happy Stampin' .....................................................    

Friday, February 18, 2011

Happiness Shared Birthday - Mojo Monday #178

Another awesome sketch from Mojo Monday!  I wanted to make something very feminine after all my masculine cards lately and this sketch proved the perfect layout.  Here's my card .....

I really like how feminine this card turned out, all the Basic Pearls take it over the top, don't you think?  I did something a bit different on this one.  I used the Stampin' Up! Vintage Wallpaper Embossing Folder on the two Very Vanilla pieces.  For the circle, I centered one of the medallions from the folder onto the circular piece, ran it through my Big Shot, then using a dauber, I daubed on some Pink Pirouette classic ink very, very lightly ( or as my favourite grandson says, vee, vee, light  LOL).  Then for the rectangular piece I used the same embossing folder but I used 2 different sections of it.  There is a medallion part under the flower embellishment, and one of the edges to put some along the bottom.  Then I again daubed some Pink Pirouette classic ink very, very lightly so the colour only goes on the raised portions of the embossed image.  I stamped the large Dogwood Blossom from the set Happiness Shared in Basic Black ink on Very Vanilla cardstock, coloured it with an Aqua Pen and the Watercolour Wonder Crayons and fussy cut it out.  Then I adhered it to the top of the rectangular piece over some of the embossing.
Stamps:  Happiness Shared, Bring On The Cake
Ink:  Basic Black, Pink Pirouette
Paper:  Elegant Soiree
Cardstock:  Pink Pirouette, Basic Black, Very Vanilla
Other:  2-3/8" Circle Punch, 1-3/4" Circle Punch, Circles Die, Vintage Wallpaper Embossing Folder, Watercolour Wonder Crayons (Regal Rose, Old Olive), Basic Pearls, Dauber, Pretty In Pink Taffeta Ribbon
Here is an upclose picture of some of the embossing and floral details ....


Thanks for taking the time to visit my blog today, Happy Stampin'

Tuesday, February 8, 2011

Thinking Of Spring - Mojo Monday #177

Another great sketch from Mojo Monday again this week.  Here's the sketch ......

and here is my version of the sketch .............
I used some new stuff on this card.  New Rubber and New Designer Series Paper, both of which I got for FREE recently.  The stamp set - Something To Celebrate - is a Hostess Reward set, and the stamp set - Punch Bunch - is a Sale-A-Bration FREE set.  The designer series paper - Springtime Vintage - is from the Occasions Mini catalogue and I got it FREE with my Hostess Rewards money!  Can't beat that!
Stamps:  Punch Bunch, Something To Celebrate
Ink:  Pear Pizzazz, Rose Red, Always Artichoke
Paper:  Springtime Vintage DSP
Cardstock:  Very Vanilla, Pear Pizzazz
Other:  Scallop Circle punch, 1-3/8" Circle punch, Basic Pearls, Perfect Polka Dots Embossing Folder
I am going to make up more of these wonderful cards to send to my downline (complete with recipe), so watch out ladies, they will be coming soon! If you want to join my downline team, just contact me. Right now you can become a Stampin' Up! Demonstrator for 15% off AND get an extra $60 in awesome products for FREE!!!!
Thanks for visiting today, Happy Stampin' ......   Glenda Mollet

Tuesday, February 1, 2011

A Sunny Garden - Mojo Monday #176

I love this week's Mojo Monday sketch.  I used to make a card like this every once in a while, but have not done so in a few years now.  Here's my interpretation of the sketch ..............

You can't see the texture very well, but I used a texture plate for the peach parfait piece on the bottom called Perfect Details.  I also used another one of the Movers and Shapers Magnetic dies - Punch Windows.  A fun, bright and springy card for you today.  We had sunshine yesterday and it was awesome and boy was the sunrise a gorgeous surprise.
Stamps:  Punch Potpourri, Elegant Cheer
Ink:  Daffodil Delight, Poppy Parade, Peach Parfait
Paper: Sunny Garden DSP
Cardstock:  Whisper White, Basic Gray, Old Olive
Other:  Boho Blossom punch, Little Leaves die, Mover and Shapers Magnetic die - Punch Windows, Scallop Oval punch, basic rhinestones, Perfect Details texture plate
Bye for now and Happy Stampin'  ..................  Glenda Mollet

Thursday, January 27, 2011

Thoughts - Mojo Monday #175

Another wonderful sketch from Mojo Monday.  This one is Sketch #175, check it out, I love this one!!!  Here's my take on the sketch ... .... .....
I started out with Basic Black and Very Vanilla, taking the colours from the Stampin' Up! designer series paper - Newsprint.  Then spiced it up with some Real Red Satin Ribbon and Basic Pearls (yes I did fix the upward sweep on the right hand side!!!).  For the rectangular vanilla section, I ran it through the crimper, then flattened it out again.  It gave the paper just a hint of texture and made it quite shiney.  It turned out much better than I anticipated.
I hope you get the chance to ink up your stamps today.  I think a day without stampin, is like a day without sunshine.
Stamps:  Priceless, Whimsical Words
Ink:  Basic Black
Paper:  Newsprint DSP
Cardstock: Vanilla Confetti, Basic Black, Very Vanilla
Other:  Circle Cutter, 2-1/2" Circle Punch, Basic Pearls, Real Red Satin Ribbon, Crimper
Happy Stampin' and thanks so very much for visiting today!          Glenda Mollet

Saturday, January 22, 2011

Button Birthday - Mojo Monday #174

I recently saw a card on someone's blog that used buttons for the flower heads.  I loved that idea and made my own. I used the Mojo Monday sketch challenge #174 for the layout on this card.
Here you go ......

I think these cute button flowers look like smiley faces, don't you???  A bright and cheerful birthday card that would certainly brighten anyone's day a bit.
Stamps:  happy Together, Occasional Quotes
Ink:  Basic Black, Old Olive
Paper:  Sunny Garden Designer Series Paper
Cardstock:  Whisper White, Basic Black, Poppy Parade
Other:  Brights Designer Buttons (5), 2-3/8" Scallop Circle Punch, Circles #2 Die, Big Shot, Poppy Parade Stitched Poly Ribbon
Thanks for visiting, I hope you have a fantabulous weekend!  Dont' forget Sale-A-Bration starts on Tues. January 25th, with lots of FREE stamps, ribbon and buttons available.  Are you a "digital" person?  Well SAB also has FREE digital downloads!!  Can't beat that.         Glenda Mollet

Saturday, January 8, 2011

Magnolia Card - Tilda (new) - Mojo Monday 172

Ahhhh, I had such wonderful time creating this card.  I love it when I get time to create a card just because.  I wanted to make a card for this week's Mojo Monday Sketch Challenge 172.  I love these sketches, they work so well with all different kinds of cards.  Here is the card I made this week .... .... .... ....

This is one of the new Magnolia stamps that I got recently.  This Tilda is not even released yet so I don't know her name.  She is one of the cutest ones so far, tho.  I love the balloon.  I stamped her with half of Open Gate from the 2010 Hoppy Easter Collection.  When I got this stamp, I cut it in half so I could use it singly, or spread it apart further.  Here is a different view .......

You can see a bit of the 3D effect I did on the flowers that are growing up the fence.  I stamped the 3 open buds again on watercolour paper, coloured them and popped them up on dimensionals.  Then I added a teeny, tiny pearl to the center of each one.....


I punched a piece of Orchid Opulence cardstock with a MS punch (the latticey one) then slipped a piece of Old Olive cardstock behind the lattice part.  Then I ran some Old Olive 1-1/4" Striped Grosgrain Ribbon around the card.  Tilda was stamped on watercolour paper using StazOn black ink, then I coloured her with Stampin' Up! Markers and an Aqua Pen using a watercolour technique.  Then it was time to cut her out. I used the "out of the box" technique and the largest round nestability.  The black circle was cut using my Circle Cutter Plus.  Here is a closer view of Tilda .....


I used a mixture of companies for the supplies for this card.
Stamps:  Magnolia - Tilda (new), Stampin' Up! Happy Birthday from Messages For Mom
Ink:  StazOn Black
Designer Paper:  Stampin' Up! Cottage Wall (retired)
Cardstock:  All Stampin' Up! - Naturals White, Old Olive, Rich Razzleberry, Orchid Opulence (retired), Basic Black, Watercolour paper
Other:  Punch - Martha Stewart: Lattice; Punches - Stampin' Up!: Modern Label, Movers and Shapers Die, Circle Cutter; Nestabilities - largest circle. Old Olive 1-1/4" Grosgrain Ribbon, Crystal Effects, Basic Pearls, dollar store rhinestones
Colouring: Stampin' Write Markers, Aqua Pen and Watercolour Paper (all Stampin' Up!)
I also did a bit of 3D-ing on the inside. I stamped the Old Olive swirl on Naturals White cardstock, then stamped the flowers in Orchid Opulence and Rich Razzleberry (stamped off once), cut them out and popped them up on dimensionals.  A few Basic Rhinestones were applied to the middle of each flower.......


There you go, another Magnolia creation!  Now I can't wait to get some birthdays so I can start to give these little sweethearts away.  This one will be my Maggie Monday class card in March, so she will be around a bit yet.  If you want to come and create this card, just email me and we can make arrangements.
Bye for now ... ... ...  Glenda Mollet

Wednesday, December 29, 2010

Magnolia Card - Honey Tilda - Mojo Monday #171

A special treat today, two posts!  This one is my entry for the Mojo Monday 171 sketch.  I coloured this image of Honey Tilda with Copic markers.

I used Stampin' Up! cardstock - Whisper White, Chocolate Chip, Pear Pizzazz and Pumpkin Pie, and Designer Series Paper - Greenhouse Gala.  Tilda is "sitting" on a nestability, I used the "out of the box" technique of cutting out her legs and inserting the nestie die in behind her before I cut out the cardstock.  It looks like she is sitting on the cut out image.  Then I framed it with another nestie cut out of Chocoate Chip.    The leaves are Pear Pizzazz and I punched them with the Stampin' Up! 2 Step Bird Punch, the flower is one I picked up at Wallyworld a while ago.  I stamped Homey Tilda on Stampin' Up! Whisper White cardstock with Memento Tuxedo Black ink, then coloured her in the following Copics:
     Hat: YR07, YR04, YR02
     Clothes: YR07, YR04, YR02, YR0000
     Socks: YR02, YR0000
     Heart Antennas: YR07, YR04, YR0000
     Skin: E13, E11, D00
     Hair: E25, E31, E50
     Cheeks: R21, R20
     Wings: Y11, Y0000, Diamond Stickles
Here is a closer picture of Tilda ....
Do you see the purple ladybug on her leg?  Well, I had an "oops" with a marker when I was going around the outside of her legs after I cut them out, and it slipped and there you go, a ladybug is placed on her leg!  I looked for a red one, but this is the only colour I could find, so it had to do.
Here is the inside, not as decorated as a lot of them are, but more than I usually do ......
It is another piece of Greenhouse Gala DSP, some more leaves from the bird punch this time in Daffodil Delight, and some Whisper White ones from the Little Leaves die.  The cute little bee is from "Just Buzzin' Bye" a Stampin' Up! set.
Thanks for visiting, I hope you enjoyed both posts today!  Glenda Mollet

Sunday, December 26, 2010

Secret Tilda - Magnolia Card

The town we live in, Port Alberni, BC, is a very foggy part of the world during the winter.  So I set out to make a happy, sunny card using Secret Tilda, Fairytale Background, and Two Tulips.  I dug out my stash of retired Stampin' Up! Kaleidoscope Designer Series Paper and created this card .......


I used the Mojo Monday 170 sketch for this card.  I stamped Secret Tilda first on Stampin' Up! Watercolour Paper using Basic Black Classic Ink, then masked her and stamped the Fairytale Background over top.  The Two Tulips stamp was stamped on a separate piece of WC paper and cut out after colouring. I coloured the scene with my Stampin' Write Markers and an Aqua Pen.  Kaleidoscope DSP has some retired colours in it, so I had to dig out my retired markers.  I also used Gable Green cardstock and the Little Leaves Die to make the leaves behind the Two Tulips. The fluffy clouds have some Liquid Applique on them.
Here is a close up picture of Secret Tilda ......

and a close up view of the entire scene .........


This is a picture of the tulips I stamped on the envelope and the left hand side of the card  ......


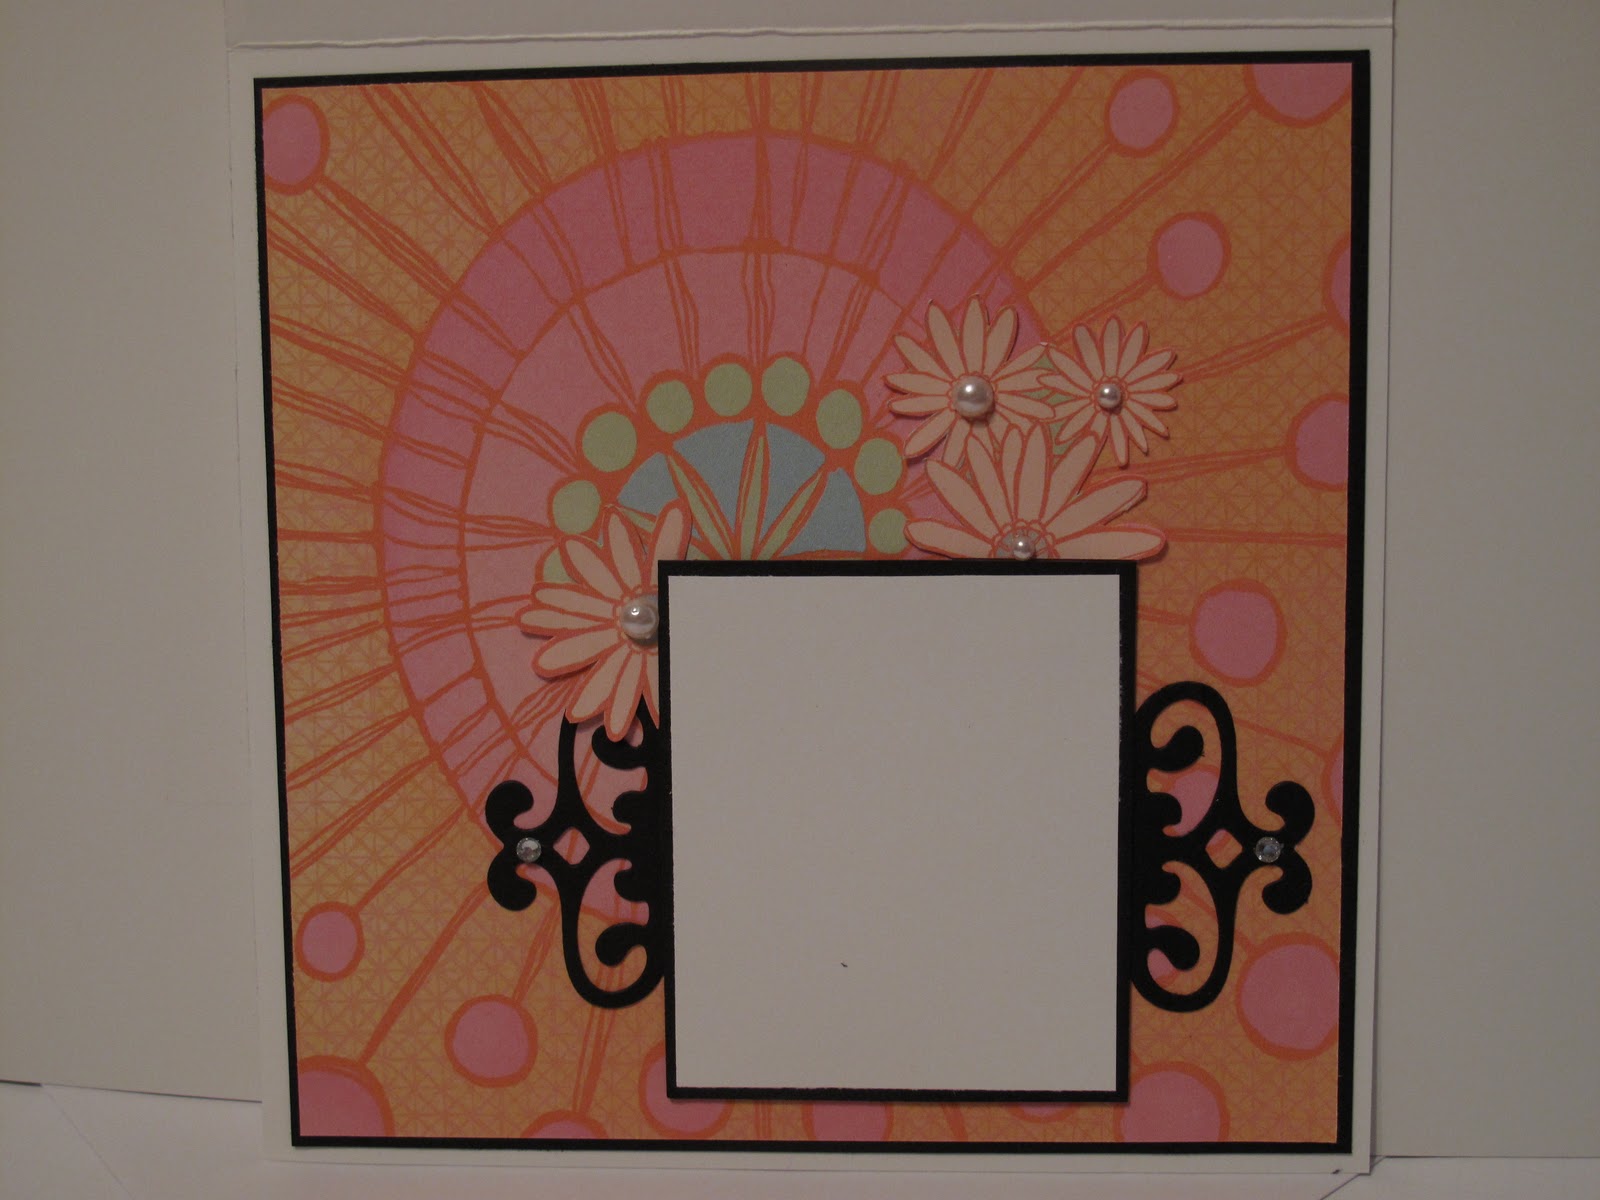
And finally a look at the inside of the card.  I used a nestability to make the frame thing around the area for writing, and added a couple of Basic Rhinestones for some bling.  Then I hand cut out some flowers from the DSP, and put some Basic Pearls on them.  I cut the DSP so it looks like a sunburst ...... 


 I have so much fun creating this little gems, and over the holiday season I hope to get more done.  I get to let my creativity flow and use lots of items on them.  I know most of the products I used on this card is Stampin' Up!, but I did try to add some non SU flowers and ribbon and trinkets, but it just did not look right.  Maybe next time!
I hope your Christmas was awesome yesterday, and today you get a chance to rest and relax now that it is all over for another year.  Yummy leftover turkey sandwiches mean NO COOKING today!
Happy Stampin', thanks for visiting ...........  Glenda Mollet

Saturday, December 25, 2010

Morning Cup - Mojo Monday 169

Merry Christmas Everyone!  Ho Ho Ho .... .... ....
When I saw this week's Mojo Monday 169 sketch, I knew I had to create something with it.  I recently got the Stampin' Up! set "Morning Cup".  I know, I know, what took me so long.  Well I am basically a "floral" card maker, but all at once this set hit me and I had to order it.  It is really fun to create cards with it.  I made my December Thank You cards out of it as well.  Here is the Thank You card I created . . . .


I bought the wheel, Take A Sip, as well and had a lot of fun using it too.   And here is the card .. ... ....

I used my very favourite designer series paper, Elegant Soiree!  This paper is like comfort food to my eyes.  To create the scalloped corners on the DSP, I used the Scallop Circle Punch, then added Basic Rhinestones on the curves.  I did a watercolour technique on the stamped images with Stampin' Write Markers and an Aqua Pen.
Here is the recipe for this card (all Stampin' Up!):
Stamps - Morning Cup, Occasional Quotes
Ink - Basic Black
Markers - Baja Breeze, Crumb Cake, Early Espresso, Daffodil Delight, Old Olive
Paper - Elegant Soiree DSP, Very Vanilla, Early Espresso, Watercolour Paper
Other - Aqua Pen, Marina Mist Taffeta Ribbon, Basic Rhinestones, Dimensionals, Scallop Circle Punch, 1-3/8" Circle Punch, Corner Rounder Punch
Season' Greetings to you and your family, and I hope all is well in your corner of the world!
Glenda Mollet

Monday, October 11, 2010

Notably Ornate Birthday Card

Today it is raining cougars and wolves here (you know cats and dogs only bigger LOL), so its a great day to create In My Craft Room!!!!
Each month I showcase one stamp set for my Stamp-A-Stacks, and create 3 cards using all the stamps in the set.  Last month it was "Elements Of Style", this month it is "Just Believe" and my next one will be "Notably Ornate".  I am uncertain what month it will be right now, as November I have a different kind of class up my sleeve for Christmas Cards.
Anyhoo ... ... ... here is the card I created today.  I loosely used the Mojo Monday Sketch #160 ... ... ...

 Here is what the sketch is ... ... ...

And here is an up close picture of the bling ... ... ...

For the scalloped edge on the Early Espresso piece I used the new Stampin' Up! Bat Punch!  Yup, can you believe it?????   I cut a piece of cardstock 1-1/2 x 4-1/4.  Then pushed the cardstock all the way into the punch and punched a row of bats out. I will do a quick post on how to do this right after posting this one.
I stamped the bird in Early Espresso on Very Vanilla, hand cut it out, then spritzed it with Champagne Mist Shimmer Spritz, let that dry, then spritzed it with Platinum Shimmer Spritz as well.  Talk about blingy!!  I used 3 Neutrals Glimmer Brads, and 2 In Colour Glimmer Brads to bling it up even more.  For the sentiment I used the frame stamp from Notably Ornate, inked it with my Early Espresso Stampin' Write Marker, then stamped Birthday Wishes from Ocassional Quotes inside the frame also using Early Espresso ink.
The main image is stamped on Very Vanilla in Early Espresso Classic Ink, then I sponged Blushing Bride around the outside, and Regal Rose right on the very edges.  A Vintage Brad gathers the Early Espresso Satin Ribbon.  I used my Teahouse Background stamp on the Regal Rose layer in Regal Rose Classic Ink.
Ahh, it felt so good to get back into card making again.  I have been so busy prepping for classes the past little while.
Off now to create another one out of this stamp set, check back tomorrow I hope to have it posted then.
Happy Stampin' ... ... ... ...   Glenda Mollet

Tuesday, September 28, 2010

We Wish You A Merry Crittermas! Musical Card - Mojo Monday #158

Stampin' Up! now sells special greeting cards.  One is a recordable card that you can record anything on, over and over again if you want. Messages from Gramma, Special Music, Valentine's Day Messages, the possibilities are endless.  The second one plays "We Wish You A Merry Christmas" when the button is pushed.  They are both in the Holiday Mini Catalogue -Page 15 - Item#121009 Recordable, and #121007 Musical - $7.50 each.
Yesterday I decided I needed to make one of the muscial cards up and I have not used my Merry Crittermas set, also from the Stampin' Up! Holiday Mini catalogue (page 39 - Item 120855 wood - $28.95, or #121181 clear mount - $21.95).  I also used the Mojo Monday Sketch #158.  So I let my creative juices flow and this is what I came up with... ... ...


This card also uses Candy Cane Specialty Designer Series Paper which has some lovely red glitter on the stripes, 3 of the new Glimmer Brads (Bold Collection), 1/8" Taffeta Ribbon - Real Red which I did a different kind of treatment with, and I watercoloured with the old Watercolour Wonder Crayons.  I have been patiently waiting for the new ones to become available, but could wait no longer.  This card was screaming "Paint Me, Paint Me", so I did!
Here is a close up of the singing critter.  I stamped the critters on Shimmery White cardstock with Basic Black Classic Ink, and they are shimmery.  You can see a bit in this close up  ... ... ...

And this is the inside where I had to put something over the "button" to make the card sing.  The speaker is hidden under the cardstock ... ... ...

Thanks for visiting, if you want to order this stamp set, or some of the recordable or musical card blanks, just contact me.  My email link is up at the top of my blog on the left hand side.
*** *** *** ***   Glenda Mollet

Saturday, September 25, 2010

Christmas All Year Long - Magnolia Blog Hop - September

It's the 25th of the month, and that means another Christmas All Year Long Blog Hop using Magnolia images.  It's also a great way to get some Christmas Cards done for very special people! 
If  you arrived from Deb Zachrich's blog, you are on the right track.  If not, go back to the Magnolia-Licious Christmas All Year Long blog and start at the beginning to see all the great creations.
My card this month uses Edwin as Santa's Helper.  This is one of the cards I created for my new class "Magnolia Monday" where I am showing stampers different methods of colouring using Stampin' Up! Markers, Water Colour Crayons, etc.  It is also Mojo Monday #155 sketch.
Enough already, here is my card.... .... .... ....
All supplies, except the stamped image and the Stickles, are Stampin' Up!  I used  the new Candy Cane Specialty Designer Series Paper for the striped piece, the scallop oval piece, and the presents piece on the top.  It has red bling on the stripes!  Whisper White, Garden Green and Real Red are the cardstock colours I used.  Edcwin is sitting on a stripe of Real Red Satin Ribbon.  I used the Tag and Small Tag punches to punch out for the sentiment, then I did not have one to fit it.  So I just hand wrote in the sentiment I wanted.  Two of the new Glimmer Brads in the top corners finish off the card.  I love all the new blingy products in the new Stampin' Up! Holiday Mini Catalogue, oh my!!!
Edwin is stamped in StazOn ink, on Water Colour Paper, and coloured in with Stampin' Write Markers and an Aqua Pen.  Then I used lots of Star Dust Stickles on the fur parts of his costume.
Here is a closer picture of Edwin.....

Thanks for joining our Blog Hop today.  Your next stop is  Jessica Hammond, and I know she has a fabulous card all ready for you.
Happy Stampin' .... .... .... .... Glenda Mollet

Monday, September 6, 2010

Just Believe - Elegant Soiree DSP

Another card for one of my October classes where I want to showcase the Stampin' Up! stamp set "Just Believe".  This set is so versatile, it has floral images, sentiments and frames.  How much better can a stamp set get??? 
Elegant Soiree Designer Series Paper is my very favourite of the new Stampin' Up! 2010-11 Idea Book And Catalogue (page 175).  The colours in it are Soft Suede, Baja Breeze, Very Vanilla and Crumb Cake.  Hmmm don't you just feel comforted just reading the names?  I paired the DSP and stamp set with the Mojo Monday 139 sketch (a while ago I know, but it sure worked for this card).  Again I used some Basic Pearls on the sentiment piece.  If you would like the instructions, and recipe, you will have to join us next month for my class that will feature this awesome stamp set, "Just Believe".
Happy Stampin' ..... ..... .....  Glenda Mollet

Sunday, September 5, 2010

Just Believe - Concord Crush and Bashful Blue

I have a card for you today that I made for Mojo Monday 154 sketch.  I am showcasing the Stampin' Up! stamp set "Just Believe" in one of my card classes in October, so this is what I came up with for one of the cards.....

The colours are Bashful Blue, Concord Crush and Whisper White.  I also just had to add some Basic Rhinestones.  I am sooooo happy that Stampin' Up! added these, and the Basic Pearls, to the product line.  I use them all the time now, just can't get away from them.
Thanks for looking, I hope you get a chance to do the Mojo Monday sketches, they are awesome.
Bye for now......  Glenda Mollet

Friday, May 14, 2010

Spring Song - Mojo Monday #138

I created this card for this week's Mojo Monday Sketch Challenge.  HERE is the link to that sketch.
Here is my card ..............
For this card I used:
Stamps:  Spring Song, Very Versatile
Ink:  Basic Black and Perfect Plum
Markers:  Mellow Moss, Always Artichoke, Old Olive, Perfect Plum, Lovely Lilac, Ruby Red, Apricot Appeal, Going Gray
Paper:  Shades of Spring DSP
Cardstock:  Very Vanilla, Perfect Plum
Other:  Large Oval, Small Oval, Itty Bitty Flower and 1/4" Circle Punches
I really like this sketch, but then I like most of the Mojo Monday sketches, they are quite easy to use and are adaptable too.
Thanks for looking, I'll be back soon.
~*~*~*~*~*~*~* Glenda Mollet


Monday, April 26, 2010

Shabby Chic - Mojo Monday - 136

Hi out there in Stampin' Land ~  I had another great day!  Every other Wednesday morning I go to our local Community Centre and stamp up a storm with some of the ladies from the local seniors group - Sunshine Club.  They really keep me hopping coming up with projects that they have not done before.  Most of these ladies have been stamping for a very long time and create such impressive cards!
Last time I was there, one of them requested we do a card using the Shimmer Paints again.  I have not used them much lately, as it goes "out of sight out of mind".  They are in one of my drawers and don't see the light of day very often.  So Thanks! ladies for stretching my creativity.  Here is the card I came up with.........
I used a lot of Champagne Mist Shimmer Paint in different ways on this card. Here is what I did:
The Pink Pirouette card base has been spritzed with a mixture of Champagne Mist Shimmer Paint and 70% Rubbing Alcohol.
The middle piece that looks like DSP is actually cardstock that has been treated as below:
1.  On Whisper White cardstock I stamped Bella Toile background in VersaMark ink
2.  Then I embossed it in White Embossing Powder
3.  Next using a dauber I spread Regal Rose classic ink all over the cardstock, making it darker around the edges, and lighter in the middle
4.  Then I sponged some Bravo Burgundy classic ink just around the edges
5.  I wiped over everything vigorously with a piece of paper towel
6.  Then I hit it with the heat gun just to make sure it was all dried
7.  Then using a sponge I sponged Champagne Mist Shimmer Paint all over the prepared cardstock making sure I covered it all.
8.  I layered this on a piece of Bravo Burgundy cardstock
The glitter on this piece is unbelieveable, I wish I could get an acurate picture, but here is my attempt:
The sentiment piece has also been sponged with the Champagne Mist Shimmer Paint after I stamped the words on it, and I slipped it under the main part of the card.
The flower is made with Stampin' Up! 5 Petal punch.  I read somewhere on a blog how to do this technique, but can't remember whose it was, sorry.  UPDATE:  here is the link to the flowers on Lynn Larson's blog - Here's the steps to make this flower:
1.  Punch 3 Regal Rose 5 Petal Flower pieces
2.  Spritzed them with Champagne Mist Shimmer Paint Spritz
3.  Ran them through the crimper about 8 times in different directions
4.  Then I scrunched them up in very small balls and unscrunched them
5.  Separated the layers of each piece
6.  Layered one on top of the other and attached them together with a brad
7.  Then I mashed and scrunched and manipulated the layers into a flower to my liking
8.  Then I spritzed again with the Champagne Mist spritz
9.  After adhering to the card I added some Crystal Effects dots to mimic morning dew
10.  The leaves are the Little Leaves embosslits die and Old Olive cardstock


The actual putting together of this card went real quick, it was the prep work that takes the time.  But I think it was well worth the effort, it is absolutely gorgeous in real life!  Here is the inside of the card, I could not leave that un-spritzed!  I spritzed the Bravo Burgundy and Whisper White cardstocks both with more of the Champagne Mist spritz and added some stamped images in Regal Rose and Bravo Burgundy.
I don't think you would want to mail one of these cards due to the flower.  But you could, it would just cost a bit more.  But hand delivering it gives you a chance to witness its unveiling!!!!
Thanks so much for visiting again today, and I hope you havea great week.  I am busy with classes etc. but hope to do more stamping soon.
Glenda Mollet

LinkWithin

Related Posts with Thumbnails