Showing posts with label Christmas. Show all posts

Monday, September 1, 2025

Festive Friends Spanner Fun Fold Card Tutorial

 Hi Friends!

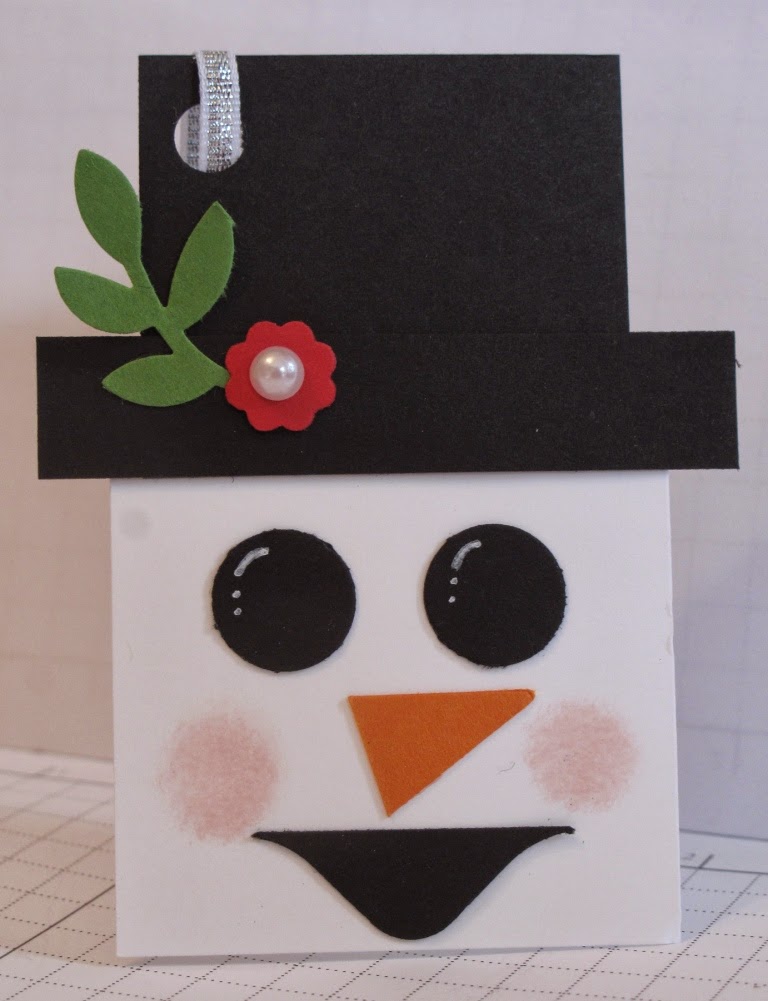
Today I’m sharing a festive and playful Spanner Fun Fold Card featuring the brand new Festive Friends bundle, along with Large Gold Hoops and the beautiful Lights of Aurora designer paper from Stampin’ Up!®. This unique fun fold is a great way to add extra interest to your handmade Christmas cards, and it’s easier to create than it looks.


The Festive Friends bundle is filled with adorable images and versatile sentiments, making it perfect for holiday cardmaking. Pairing it with the Lights of Aurora paper and metallic accents creates a stunning background that feels magical and bright. The spanner fun fold design ties it all together with a creative twist that will wow anyone who opens the card.

Here's the full measurements and supply list so you can easily follow along and recreate this card yourself.


This project also ties into the upcoming Christmas Card Class I’m collaborating on with Denise Cox of Birdsnest Designs. We’ll be featuring the Festive Friends bundle, creating 4 festive cards together, and offering the chance to earn up to 4 bonus card tutorials.

CLICK HERE for more information on the class, and to reserve your spot NOW. Registration closes today!

You can watch the step-by-step video tutorial for all the details and inspiration.


Thank you so much for watching! If you enjoyed the video, I’d love it if you subscribed to my YouTube channel. It’s the best way to stay updated on all my latest card making tutorials, stamping tips, and live demonstrations. Make sure to hit the bell so you’ll be notified every time a new video goes live.

Want 2 FREE card tutorials from me—plus a brand-new one every single week? It’s easy to sign up! Fill out the form that drops down while you're browsing, look for it in the top right corner, or simply CLICK HERE to join the fun. Let’s keep crafting together!

Once you confirm your email, you’ll start receiving my weekly Wednesday morning newsletter at 8 AM Pacific Time. It’s filled with tutorials, tips, project ideas, and the latest updates—delivered straight to your inbox, no extra clicks needed. And Saturday at 8 am for all the up to date information on products, sales, and new releases.

Live in Canada and don’t already have a Stampin’ Up! Demonstrator? I’d love to help you discover the value, creativity, and community that being part of Stampin’ Up! offers. Whether you want a discount on your supplies or you're ready to share your love of stamping, I’m here for you.

CLICK HERE to learn more and get the link to join my Craft Room Stampers Community. You’ll get $165 worth of Stampin’ Up! products for only $135—with FREE shipping and minimal tax. It’s one of the best ways to stock up on supplies and be part of an amazing crafting community.

And yes—demonstrators get early access to every catalogue and online release... and you can even include brand-new products in your Starter Kit!

Have questions or need help getting started? EMAIL ME and I’ll help you get your kit on its way.

Stampin’ Smiles,
Glenda

(Click the image below to access all current links and info.)


Wednesday, August 27, 2025

Festive Friends Handmade Card – A Playful & Whimsical Design You’ll Love

Hi Friends!

Today I’m sharing a bright and whimsical handmade card I created with the Festive Friends bundle. This card is all about elegant details, subtle colors, and bringing a little extra fun into your crafting time. I had so much fun designing it, and I think you’ll enjoy making it just as much.


The Festive Friends bundle is such a versatile set for creating lighthearted cards that bring a smile to anyone’s face. But it can also create elegant cards that are unexpected. 

If you love cards that are elegant, subtle, and full of personality, this one is for you. It’s a great example of how you can take a fun stamp and die set and create an elegant and sophisticated design.

I’ve included a full video tutorial at the bottom of this post where you can watch me create the card step by step. In the video, you’ll also find the complete supply list and measurements, so you can recreate the project easily in your own craft space.

Ready to see Festive Friends in action? Here's the video tutorial to get inspired to make your own cheerful creations. 


Thank you so much for watching! If you enjoyed the video, I’d love it if you subscribed to my YouTube channel. It’s the best way to stay updated on all my latest card making tutorials, stamping tips, and live demonstrations. Make sure to hit the bell so you’ll be notified every time a new video goes live.

Want 2 FREE card tutorials from me—plus a brand-new one every single week? It’s easy to sign up! Fill out the form that drops down while you're browsing, look for it in the top right corner, or simply CLICK HERE to join the fun. Let’s keep crafting together!

Once you confirm your email, you’ll start receiving my weekly Wednesday morning newsletter at 8 AM Pacific Time. It’s filled with tutorials, tips, project ideas, and the latest updates—delivered straight to your inbox, no extra clicks needed. And Saturday at 8 am for all the up to date information on products, sales, and new releases.

Live in Canada and don’t already have a Stampin’ Up! Demonstrator? I’d love to help you discover the value, creativity, and community that being part of Stampin’ Up! offers. Whether you want a discount on your supplies or you're ready to share your love of stamping, I’m here for you.

CLICK HERE to learn more and get the link to join my Craft Room Stampers Community. You’ll get $165 worth of Stampin’ Up! products for only $135—with FREE shipping and minimal tax. It’s one of the best ways to stock up on supplies and be part of an amazing crafting community.

And yes—demonstrators get early access to every catalogue and online release... and you can even include brand-new products in your Starter Kit!

Have questions or need help getting started? EMAIL ME and I’ll help you get your kit on its way.

Stampin’ Smiles,
Glenda

(Click the image below to access all current links and info.)

Friday, November 3, 2023

Sharing 12 Weeks Of Christmas Tutorials With You - Week #7 Forever Forest Card and downloadable PDF Tutorial.

Hi Friends!

Today is another amazing card in the 12 Weeks of Christmas series for this year.

This card is by Debbie Flattum, one of my 12 Weeks Collaborator friends.

I do not have this bundle, so today I am only sharing the PDF tutorial and a picture of the card.

I do go live most Tuesdays until Dec 12th, with video tutorials on this years 12 Weeks Of Christmas and you can find the other tutorials on my YouTube Channel.

CLICK HERE to download the PDF.

CLICK HERE to go to my YouTube Channel and watch the other weeks video tutorials.

I will be live next Tuesday, November 7th with a great card by Kim Meyers using the Horse & Sleigh bundle. I hope you can join me ...

Would you like 2 FREE Card Tutorials from me?  Just fill out the form that pops down from the top while you are reading my blog, or at the top on the right hand side, or CLICK HERE

You will receive an opportunity to subscribe to the Newsletters, and other ways to get more information, tutorials and other great value once you confirm that you want to opt into receiving my emails, then you are all set for next Tuesday morning at 8 am Pacific Time. The Newsletter will slide right into your email inbox, you don't have to do anything, and you will be in the know

Do you live in Canada and don't already have a Stampin' Up! Demonstrator? I'd love to help you find all the value and community that I've found. Let's work together to get started!

CLICK HERE to get more information and a link to join our Craft Room Stampers Community.

Stampin' Smiles!


Friday, October 27, 2023

12 Weeks of Christmas Projects - Week #6. Introducing a great treat holder complete with video tutorial just for you.

Hi Friends!

Do you use Treat Holders in your gift giving?

I certainly do. I love to spoil my Monthly Stamping Club and Craft Room Stampers Team with gifties every once in a while.

This one by Kim Meyers, is perfect to add some chocolate too, or let you imagination go and fill it with something curated for the recipient! 

I shared how to create this wonderful treat holder during my YouTube Live demonstration on Tuesday night (8 pm Pacific Time). Then we went on and I showed how to custom create other treat holders the same way for different sized treats. It's SO EASY!

Watch the video to see what I put inside it when it was done, and what bundle I used to complete the box.

CLICK HERE to download the PDF tutorial.

If you would like to see how I created it, click on the picture below to watch the video tutorial on my YouTube channel. If you enjoy the video, please consider subscribing to my YouTube Channel so you don't miss any of my videos, tutorials and Live Stamping. Once you have subscribed, click on the bell icon to get notification when I add to my channel.


Would you like 2 FREE Card Tutorials from me?  Just fill out the form that pops down from the top while you are reading my blog, or at the top on the right hand side, or CLICK HERE

You will receive an opportunity to subscribe to the Newsletters, and other ways to get more information, tutorials and other great value once you confirm that you want to opt into receiving my emails, then you are all set for next Tuesday morning at 8 am Pacific Time. The Newsletter will slide right into your email inbox, you don't have to do anything, and you will be in the know

Do you live in Canada and don't already have a Stampin' Up! Demonstrator? I'd love to help you find all the value and community that I've found. Let's work together to get started!

CLICK HERE to get more information and a link to join our Craft Room Stampers Community.

Stampin' Smiles!


Wednesday, September 21, 2022

Would you like to see how to create this card using the Merriest Moments stamp set, dies and hybrid embossing folder by Stampin' Up!?

  Hi Friends!

The moment I saw a card by Donna Leonard, I knew I HAD to make it.

I get a lot of my inspiration from Pinterest, and this one jumped out at me.

I am very fond of cards that use lots of white. White on White on White with a pop of colour are my favourite cards to look at and to make.

I did some embossing inside as well ...

I shared how to create this card last Monday during my facebook live stamping demonstration.

You can see how I created it by watching the video below (click on the picture at the end of this post to watch the video).

Here's what you will need to create it:

  Thick Basic White 8 1/2 x 5 1/2

  Basic White 5 1/4 x 4, 5 1/2 x 4 1/4, 3 x 5 1/4

  In Colour Opal Rounds

  Merriest Frames dies

  Merriest Frames Hybrid embossing folder

  Merriest Frames stamp set

  Ink:  Fresh Freesia, Old Olive

  Other: Wink Of Stella

Watch the video to see how you can die cut and emboss AT THE SAME TIME!!! It's magical.


Please subscribe to my YouTube Channel so you don't miss any of my videos, tutorials and Live Stamping. Once you have subscribed, click on the bell icon to get notification when I add to my channel. 

Leave me a comment. Do you like white on white cards too????

I would love to have you as part of my Canadian Team - The Craft Room Stampers.

CLICK HERE to get more information and a link to get the Starter Kit. 

 Stampin' Smiles!


Monday, July 6, 2020

Mystery Stamping Monday - Winter Woods

Hi Eveyone!

Today on my facebook page we did some mystery stamping. 
Here's a link to my facebook live post ...

 https://www.facebook.com/InMyCraftRoomStampingWithGlenda/videos/298847294645203

I chose a card from page 61 of the new Stampin' Up! Annual Catalogue.  Then I sent out a recipe for the card and everyone used their own supplies to create along with me.

They had no idea what we were making until it started to take shape. This is so much fun, and I would love it if you could join me and create along with us.

CLICK HERE to go to my facebook page - In My Craft Room Stamping With Glenda, and like it to make sure you don't miss any of my facebook lives.

I started out to make 1 card, and ended up making 2 because I wanted to see what one of the gold overlays from the Forever Gold Specialty Paper would look like.  The first card uses one of the die cuts that is a label, the second one uses one of the overlays.


What do you think?  Do you like the first one or the second one better?


Here's the link to the video on YouTube ....  https://youtu.be/2wEH_vzK2gc 


Have a great day!
Stampin' Smiles
Glenda Mollet

Monday, December 19, 2016

Stampin' Up! Santa's Sleigh and Rudolph

Hello Friends!

Another wonderful card for you today.  Once again I am showcasing the Santa's Sleigh Bundle and Very Vanilla cardstock.  In THIS POST from last week, I shared another Santa's Sleigh vanilla card and my thoughts on Very Vanilla in my life.


I used another embossing folder called Holly by Stampin' Up! to provide some texture behind the sleigh and reindeer.  A bit of Gold Baker's Twine provides the reins and a bit more bling.

Cherry Cobbler 8,5 x 5.25, 3 x 2.5, 2.75 x .5
Very Vanilla 5.25 x 4, 2-5/8 x 3/8
Gold Foil 3.75 x 2.5
Gold Glimmer 3 x 2.5
Gold Baker's Twine (from the Baker's Twine Trio Pack) 4.5 ins
Santa's Sleigh Bundle - Santa's Sleigh stamp set and Santa's Sleigh Dies
Holly Embossing Folder
Ink:  Cherry Cobbler, Always Artichoke
Markers:  Cherry Cobbler, Wink of Stella Gold Brush Pen, red sharpie (non Stampin' Up!)

Once again this card is all about layering great pieces together. The reindeer and sentiment are popped up on Dimensionals.  I used the Fine Tip Glue Pen to attach the filigree piece of the sleigh to the gold foil base.  Then I used the red sharpie to give Rudolph a red nose.

It's getting close to Christmas and I can't wait!  I am almost ready just a couple of pies to bake.  Anyone who knows me knows how much I would rather be In My Craft Room creating than in the kitchen doing anything.  But one of my favourite things at the Christmas dinner table is Pumpkin Pie.  I make a double pie and put it into one crust. This way I can have two pieces in one!  And my hubby's favourite desert is Apple Pie (not my favourite) so I make it for him when I make my pumpkin one.  What is your favourite Christmas desert?

CLICK HERE to go to my online store and order some great Christmas products by Stampin' Up! before they go away for good on January 4th.  Some items are already sold out, but the stamps are guaranteed to be available until Dec 21st, so you only have a few days left. If you place an order online, and use the Host Code NBFZ33YH before Christmas Day, I will send you a special gift in the mail to thank you for your order.  Or you can EMAIL ME and I will be happy to place the order for you, and still give you the special gift.

Have a Crafty Day!  Glenda Mollet


Friday, December 16, 2016

Stampin' Up! Merry Christmouse!

Hello Friends!

A favourite set of mine from the 2016 Stampin' Up! Holiday Catalogue is Merry Mice.  The images in this set are just so darned cute (click on the image to go to my online store for more information).

https://www.stampinup.com/ecweb/ProductDetails.aspx?productID=142145
 This cute stamp set is now on sale for 20% off, but only guaranteed to be in stock until Dec 21st.
The stamp with the 3 mice on it is quite versatile.  I cut it up so I could use just one or two of the mice at once.  Here's the card I created using one of the images from the stamp set.....


I inked up the Softly Falling embossing folder with Marina Mist ink on the side with the Stampin' Up! logo on it, and then put a piece of Whisper White cardstock in it and ran it through the Big Shot.  That transfers the ink onto the cardstock and fills in the background. The snowflake dots remain white so it looks like a blue sky with white snowflakes falling.  Such a great technique, don't you agree?

Thick Whisper White 4.25 x 11
Dapper Denim 5.25 x 4
Whisper White 5-1/8 x 3-7/8, 2 x 3, 1 x 3
Dazzling Diamonds Glimmer 3-7/8 x 1-1/2
Merry Mice stamp set
Silver Thread - enough to wrap around your fingers about 6 times
Softly Falling embossing folder
White Pompom from the Whisper White Mini Pompom Trim
Classic Label Punch
Ink:  Archival Basic Black, Soft Suede, Smoky Slate, Marina Mist, Real Red, Dapper Denim, Crumb Cake
Markers:  Basic Black, Dapper Denim, Wink of Stella Clear Brush Pen, Blender Pen

CLICK HERE to go to my online store and order some great Christmas products by Stampin' Up! before they go away for good on January 4th.  Some items are already sold out, but the stamps are guaranteed to be available until Dec 21st, so you only have a few days left. If you place an order online, and use the Host Code NBFZ33YH before Christmas Day, I will send you a special gift in the mail to thank you for your order.  Or please EMAIL ME and I will be happy to place the order for you, and still give you the special gift.

Have a Crafty Day!  Glenda Mollet

Monday, December 12, 2016

Stampin' Up! Embossed Christmas Deer Card

Hello Friends!

I have been a bit remiss lately with my blog posts.  My hope is to rectify that and be more consistent.  So here goes ......

This card uses the Santa's Sleigh Bundle of products by Stampin' Up!


I have discovered that Very Vanilla is one of my favourite colours.  I just love looking at things that are vanilla whether it is cards, clothing, decor or food.  The texture from the Cable Knit Dynamic Embossing Folder just makes you want to touch and feel this card, doesn't it?

Real Red 8.5 x 5.5, 1.25 x 1.25
Soft Suede 5.25 x 4, 3.25 x 2
Very Vanilla 5-/8 x 3-7/8, 1.25 x 4.25
Emerald Envy 4.25 x 2.75, 1.5 x 1.5
Santa's Sleigh Bundle - Santa's Sleigh stamp set, Santa's Sleigh Dies
Star of Light stamp set (sentiment)
Bunch of Banners Dies
Cable Knit Dynamic Embossing Folder
Brights Enamel Dots
Ink:  Real Red, Early Espresso, Emerald Envy
Markers:  Real Red, Wink of Stella Clear Brush Pen
Inspired by Terri Takashige on Pinterest

This card is easy to assemble, it's just layering one on top of the other.  The sentiment, tree and reindeer are popped up on dimensionals.  I used the Wink of Stella Clear Brush Pen on the tree, bow and wreath. Then I put a red enamel dot on Rudolph's nose.

I hope you have your holiday cards complete.  It is such a great feeling to put them in the mail box and send them off to all of the special people in our lives.

 CLICK HERE to go to my online store and order some great Christmas products by Stampin' Up! before they go away for good on January 4th.  Some items are already sold out, but the stamps are guaranteed to be available until Dec 21st, so you only have a few days left. If you place an order online, and use the Host Code NBFZ33YH before Christmas Day, I will send you a special gift in the mail to thank you for your order.  Or you can EMAIL ME and I will be happy to place the order for you, and still give you the special gift.

Have a crafty day!  Glenda Mollet

Wednesday, May 7, 2014

One Day Mini Retreat - Project 9 - Snowman Gift Tag

The final project was another Christmas one ....


I found this cute Snowman Gift Tag created by Maggie Patterson / Ronda Wadeon their My Stamping Best Friend site, but I don't remember where I saw it. Hey, I am just glad I remembered to write down who created it!!!  LOL  It was a free tutorial though, that I know.

  Stamps:  none
  Ink:  Blushing Bride
  Paper:  Whisper White, Basic Black, Gumball Green, Real Red, Pumpkin Pie
  Other:  Bird Punch, Itty Bitty Flower Punch, Basic Pearls, 1/2" Circle Punch, Star Punch (R) or you can hand cut the nose, Envelope Punch Board (for the mouth, this was my addition), Dauber, White Chalk Marker, Silver Ribbon, 1/4" Hole Punch

I am sure you can figure out how to create this tag just from the picture.  The remains of black cardstock after it has been punched with the Envelope Punch Board makes a really cute mouth.

This is the last of the projects from my One Day Mini Retreat.  The next post will be pictures of the Goodie Bags, Door Prizes and Pillow Gifts I handed out to each attendee.

Happy Stampin' . . . . .   

Friday, May 2, 2014

One Day Mini Retreat - Project 7 - Gift Bow Die Santa

I slipped in a bit of Christmas into the projects at my recent One Day Mini Retreat .....

It is never too early to create a Christmas card.  This year I vowed to start my Christmas cards for classes early!  I will be holding another One Day Mini Retreat in October and it will be all Christmas Themed!  I can't wait, we had so much fun at the last one.

Back in December I saw this great card online.  It was created by Amber Geeham - I think it was on Pinterest.  I loved it and had to create it.  But then Stampin' Up! retired the Gift Bow Die when the Holiday Catalogue retired.  I was BUMMED to say the least.  I so wanted to share this card.  I never gave up hope and Stampin' Up! listened to us when we pleaded with them to bring it back.  They DID!  It is on the Carry Over List - which is a list of items that are still available to order but not listed in any catalogue. 

Here is a picture of the Gift Bow Die.  If you click on it you will be taken to a link for the Carry Over List.....

http://su-media.s3.amazonaws.com/media/catalogs/NA/Holiday_Carryover/Holiday_Carryover_2014_CA.pdf

Here are the supplies for the card . . . .
  Stamps:  Petite Pairs
  Ink:  Blushing Bride, Real Red
  Paper:  Real Red, Whisper White, Silver Glimmer, Basic Black, Blushing Bride
  Other:  Gift Bow Die, Boho Blossom Punch, Perfect Pennants Die, Perfect Polka Dot EF, Owl Punch, 3/4" Circle Punch, White Chalk Pen

Now, don't you wish you had joined us for my One Day Mini Retreat?  There are still 2 projects to share with you, then I will share the Goodie Bags, Door Prizes and Pillow Gifts I handed out.  It was an awesome day!  Thank you Ladies who joined me.

Happy Stampin' .... 

Monday, December 23, 2013

Festive Flurry Gift Card Holder

 A really easy Gift Card Holder made from the Pop 'n Cuts Card Base Die.


Every year I give our Canada Post Person and the Purolator Delivery Person Tim Horton Gift Cards.  These are the gift card holders I made for them this year.  The base is cut using the Pop 'n Cuts Card Base, and the decorations on the front are cut outs using the Festive Flurry Die, the Label Framelits die and the Chalk Talk Framelits die.  Quite easy to do, and you can make the layers any colour you want.  You could even really bling it up and use the Silver Glimmer Paper for the first layer, then the Red Glimmer Paper, and maybe add some of the Champagne Glimmer Paper as well.  Don't you LOVE the glimmer papers?  I like using them to bling everything and you can punch little itty bitty pieces out and use them anywhere.  Lots of glitter and little mess.  But then again, what's a little Glitter Mess?  I am notorious for putting it in my hair during a class!  LOL
  Stamps:  Merry Little Christmas
  Ink:  Pool Party
  Markers:  Coastal Cabana, Real Red
  Paper:  Island Indigo, Winter Frost DSP Stack, Silver Foil, Whisper White, Red Glimmer, Smoky Slate (or you can use Whisper White to cut out the big snowflake)
  Other:  Pop 'n Cuts base, Festive Flurry Dies, Label Framelits Dies, Chalk Talk Framelits Dies, Basic Rhinestones, velcro dot

Not too long now until Jolly Ole St. Nick - aka Santa - flies into the houses of all good (and not so good) children (and not so children).  I will not be posting on Christmas Day, but wish all of you a wonderful Holiday Season.
Happy Holidays .....

Friday, December 20, 2013

Candy Cane Sleigh Treat Holder

So much fun!  I loved the idea of these when I ran across them on pinterest and couldn't wait to make my own.


Since I took these pictures I found the Santa chocolates I was looking for and added them to the front.  So it looks like Santa is driving the sleigh!  The bottom layer is 2 Ghirardelli Chocolates wrapped, then the next layer is another Ghirardelli which is also wrapped.  Then two Hershey Nuggets, wrapped and finally on top another wrapped Nugget.  Everything is glued together with a hot glue gun, and you start with attaching the candy canes to the bottom layer and building from there.  Then I wrapped it all up with some Cherry Cobbler Scalloped Tulle that I had left over from last year.  The Cherry Cobbler is gone, but you can still buy some of the Early Espresso one on the Clearance Rack - for only $3.39 (Canadian price).

Happy Holidays . . . . . . 

Wednesday, December 18, 2013

Best Of Christmas Smarties Treat Holder

This Christmas Smarties Treat Holder would make a great table favour for your Christmas dinner!


This is just what I am going to do with it!  I made some and will use them as dinner table favours for our family Christmas Dinner we are attending this year.  We will not be having dinner at our house, as it is our children's turn to be with "the in-laws".  So we are going to have a lunch time dinner with my hubby's Mom, two sisters and brother and his wife, a cousin and a really good friend.  It is the first time in a VERY long time that all the siblings have been together with Mom at Christmas and I can't wait.  It will be so fun.

Here is a picture of the template I drew.  I received one of these at Convention in July as a bath salts holder.  The dimensions are the same, but I turned it into a Christmas theme. (click on the picture to go to the document).

https://drive.google.com/file/d/0B0z4Rm9olrfwTndMRXR1OVB5WVk/edit?usp=sharing

Here are the supplies I used:
   Stamps:  Best of Christmas
   Ink:  Cherry Cobbler, StazOn
   Markers:  Cherry Cobbler, Real Red, Gumball Green, Blush Blossom
   Paper:  Early Espresso, Season Of Style DSP Stack, Champagne Glimmer, Whisper Whtie,
   Other:  1.8" Cello Bag, Basic Rhinestone, Christmas Ornament Punch, Christmas Smarties, Small Oval Punch (the mini one)

I hope you have a wonderful Christmas season.  I will post as often as I can, and be back in January with my regular posts.
Happy Stampin' .....  

Friday, December 13, 2013

Gift Bow Angel

This would be a wonderful addition to the Christmas Dinner Table as name cards.


I saw this cute angel on Pinterest then visited Tanya Bell's blog to get a video on how to make one using the Gift Bow Die by Stampin' Up!  Here is a picture of the one I made . . . . .


Then I thought, if I put an extra bow tail on the back, it would stand up and I could use it on the dinner table.  So I did and here is a side view picture of it ....


And up close for you.  It's real easy to add this little bit then you could leave off the twine at the top where she would hang if you put her on your tree.


It would not take a lot of time to whip a few of these angels up.  All you have to do first is purchase the Gift Bow Die.  It uses the Joyful Christmas stamp set, but you could also make it out of Brushed Gold cardstock, or some DSP if you like.  I love how the eyes are done and will use that little tid bit of punching a circle with the Itty Bitty Punch Pack circle (3/8") and then drawing around the bottom half to draw in the closed eyes.  Then just add some lashes.  Easy peasy and would work so well with some of the punch images I do classes with.

  Stamps:  Joyful Christmas, Petite Pairs (or put a person's name in that area for a table setting)
  Ink:  Cherry Cobbler, Blushing Bride
  Paper:  Very Vanilla, Champagne Glimmer, Blushing Bride
  Other:  Gift Bow Die, 1", 1-1/4", 1-3/8" and 1-3/4" Circle Punches, Word Window Punch, Itty Bitty Circle Punch, Sponge

If you would like to see different versions of this angel, just go to Pinterest or You Tube and search for Gift Bow Angel, you will be amazed at the variety of the ones you will see.

Happy Stampin' .... 

LinkWithin

Related Posts with Thumbnails