Monday, October 26, 2009

Pattern Pines and Brushed Gold Christmas Card

I created this card tonight:

I used a piece of heavy cardboard and cut out an oval using my Coluzzle. Then I taped it on the outside front of my Petals A Plenty Embossing Folder. I put a piece of Whisper White cardstock into the folder and ran it through my Big Shot. This left a "negative" area in the middle of the cardstock where the pressure from the Big Shot does not reach. This technique was demonstrated at our Vancouver Island Demo meeting earlier this month, I am sorry I cannot remember who demoed it, but thank you! Then I used a dauber and the Frost White Shimmer Paint and daubed randomly over some of the raised flower images. I stamped Patterned Pines image in the negative area with Almost Artichoke cardstock. I tied a piece of Gold Elastic Cord around the left side of the Whisper White cardstock. The sentiment is stamped in Encore Gold ink and punched out with the Modern Label punch. I then punched Brushed Gold cardstock out with the Word Window punch and over-punched that with the Modern Label punch creating the frame for the sentiment. This was mounted on a Brushed Gold layer and finally on an Almost Artichoke card. I wanted to showcase some of the items from the Holiday Mini and I think I hit quite a few of them.
Thanks ever so much for your interest in my blog. Sorry I was gone for so long, but I was away in Tofino...................... again. I know, I know, such a tough life right? LOL Well that's it for trips to Tofino this year, next one is planned for the middle of March 2010. Bummer!!!!
................. Bye for now................. Glenda Mollet

Sunday, October 25, 2009

Easy Beginner Christmas Card

One of my groups of Stampers has just gotten a new member. She is an "older" lady, and is brand new to card making. Last time we got together, I asked for requests for our next meeting. This new lady asked for a simple, easy Christmas card. So this is the one I came up with. I tried to use a minimum of colours, techniques and stamps. This one can be used with any colour, any sentiment or image, and you can use ribbon or just a strip of cardstock across the front.


Recipe:
Stamps: Christmas Punch Set
Ink: Basic Black
Paper: Whisper White, Real Red, Basic Black
Other: Basic Black 5/8" Grosgrain ribbon, dimensionals

Sometimes I spend a lot of time creating a card with layers and colours and using lots of stamps and techniques, and I forget the basic, uncomplicated card. This is one of those. Of course you could upgrade it by using a background stamp, or DSP, and maybe a layer of Real Red 1/4" Grosgrain ribbon on top of the black, and of course by using markers and colouring the image / sentiment. This was a lot of fun to create, and really went together fast. Thanks for looking........

..................................... Glenda Mollet

Wednesday, October 21, 2009

Reindeer Punchie Card

I finally got the card created for our second punchie for the October Punchie Class. These reindeer are from Andrea / Sophie at Andrea Walford's website. The card is my own creation.
Here's the card......

I am continuing with my personal goal to use up all my retired stuff. So I used some Antique Brass Hodgepodge Hardware. The Reindeer heads are popped up on dimensionals, the strip in the middle is some of the Wood Sheets and I stained it with Sahara Sand ink and a sponge, then I dabbed some Chocolate Chip ink on with a sponge very lightly and sporatic to add some dimension to the strip. I also used Frost White Shimmer Paint on the antlers. The sentiment is also up on dimensionals. Here's the entire recipe:

Stamps: Many Merry Messages
Paper: Christmas Cocoa DSP, Real Red, Whisper White and Naturals White cardstock, Wood Sheets
Ink: Soft Suede, Sahara Sand, Chocolate Chip
Other: Reindeer punchies, Antique Brass HPH, Frost White Shimmer Paint

Thanks for looking, feel free to CASE and share this card.......
Glenda Mollet

Saturday, October 17, 2009

Santa Punchie Card

This month for our Punchie Class we are doing Santa and 3 Reindeer. The 6x6's are done now I have to create the cards. Last night I had this idea for Santa. I wanted a roof and a chimney and was able to create it with the limited supplies I brought with me to our trailer in Tofino (yes I am out here AGAIN!!!).
Here is the picture of Santa on the Roof.....


Here is the ingredients:


Stamp: Sorry can't remember the name but will add it when I get home
Paper: Whisper White, Basic Black, Bashful Blue, Chocolate Chip, Really Rust, Kraft
Ink: Real Red
Other: Non SU border punch, non SU Embossing Folders, Scallop Oval and Large Oval punches, Dazzling Diamonds glitter (on the snow but you can't see it in this picture), Santa Punchie (Wanda McGlamery / Heather Summers details posted earlier).


Thanks for visiting, here is a picture of the weather today in Tofino (before the rain really hit)

Bye for now, have a super weekend. Glenda Mollet

Wednesday, October 14, 2009

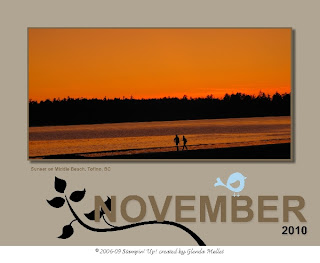
My Digital Calendar

UPDATE: I have had many queries about the pictures in my calendar. All pictures, except one, were taken by myself, the other one was taken by my DH, on our adventures in 2009! I love taking pictures wherever we go, and my new camera is fabulous. Beach pictures are my fav. I have so many of sand that I think I need to make a calendar of sand sculptures.

I was so excited to get the new My Digital Studio program from Stampin' Up! I am doing the certification process and learning a lot about this awesome program. I whipped up a card the other day, but did not post it as it was just a trial one. I've also done a couple of scrap pages, but they are just following the webinars so they are not interesting at all.

BUT today I decided to create a 2010 Calendar that we could print out and give for Christmas gifts to those "hard to buy for" people in our lives. I would love to share this project with you. I will post the calendar cover, and the picture pages of each month. Also I will post one of the calendar pages, as I kept all of them the same, just changed the colours a bit. Each holiday / special day in each month has special items around the date, such as punches, stamps, or embellishments. I really had fun creating this project and it was so easy. I started about 2 pm and finished it around 8 pm, so not bad at all.

Here is the calendar cover - the theme of this calendar is pictures of our adventures of the past 12 months.

Here are the rest of the months:


And here are a couple of calendar pages:

Contact me to find out how you can earn this awesome program ABSOLUTELY FREE...............
Thanks for looking.............................. Glenda Mollet

Tuesday, October 13, 2009

Shimmery Pattern Pines

This is another CASEd card from Andrea Walford. I am doing a Technique Class and doing Andrea's 5 Shimmer Paint Techniques and adding one of my own. The card below is my technique #2 - tinting shimmer paint with reinker and daubing it direct to stamp.

Ingredients:
Stamps: Pattern Pines, Christmas Classics
Ink: Old Olive, Basic Black
Paper: Merry Moments DSP, Real Red, Old Olive, Whisper White cardstock
Other: Playground buttons, Red Gingham ribbon, Frost White Shimmer Paint (mixed with Old Olive Classic ink)
I also used Andrea's idea of Faux Thread in the buttons - cut a small strip of matching cardstock and "thread" it through the button holes. Attach to the back with a mini glue dot. It works great, and so much easier to use than thread, and it matches too. The W White and Merry Moments DSP are sponged with Old Olive ink.
Thanks so much for looking and go check out Andrea's website, she has some great stuff there, and the ideas abound all the time.

~~~~~~~~~~~~~~~~~~~ Glenda Mollet

Friday, October 9, 2009

Umbrella Punchie Tutorial

I am working on my 2010 Coaster Calendar. While creating April, my friend and avid stamper who was sharing my craft room with me at the time, said I needed to create an umbrella punchie for it. So, rising to the challenge, I did. I am not sure if there is one out there already (I can't imagine there isn't) but I did not see anyone else's prior to making this one myself. Here are a couple of pictures of the umbrellas I put on my calendar:


I used Tea Party DSP to make the Umbrellas. The boots are from Scene In A Garden (a set I just found out today was retired, oh well, I still love it).
So here is a tutorial of how I built the Umbrellas. I will do it for the large one, but the smaller one is built the same way, you just use the small oval instead of the large oval punch.
1. Punch 3 Large Ovals from the DSP
2. Using the same punch, punch out a bit from the bottom of each oval

4. Using the Modern Label Punch, punch out one label


5. Move the punch up a bit and slightly to one side and punch again. This will be the handle.
6. Lining up the points and the tops of the ovals, attach one behind the other
7. Repeat with the other side
8. Attach the handle to the bottom of the ovals
There you go, an umbrella. You can make it using the Small, Large, or Wide Oval punches and get different sizes of them. They are so cute, and you know, April showers bring May flowers, so of course May has lots of flowers on it. When I get the whole calendar done, I will post some pictures. It may take a bit of time though, I am only up to May!
I hope you enjoy making these cute little pieces, they are very useful..............
Bye for now, Happy Thanksgiving to everyone in Canada!!!!
.............................................. Glenda Mollet

Thursday, October 8, 2009

Parks and Rec Classes

I am also doing 3 classes through our Parks and Recreation Department. Two are in October and one is in November. Here are the cards for those classes, just incase you are in the Port Alberni area and want to join us. If you do, contact our P&R department at Echo Centre.
Introduction to Rubber Stamping: Wed Oct 14 - 7-9 pm - Fir Room, Echo Centre:

Fun Punch Pals: Wed Oct 28 - 7 to 9 pm - Fir Room, Echo Centre:

and finally...........
Christmas Cards: Tues. Nov 17 - 7 to 9 pm - Fir Room, Echo Centre:
Thanks for visiting my blog, and have a great day.
~*~*~*~* Glenda Mollet ~*~*~*~*~

My October Classes

When I emailed my newsletter, I did not have pictures of my October class cards. So here they are:


October Stamp-a-Stack:

Christmas Stamp-A-Stack:


October Punchie Class:


I don't know who originated the Santa one as I forgot to write it down, if it's yours please email me (link on the left) and I will give you credit. The Reindeer are from Andrea Walford / Sophie Landry.

UPDATE: I had an email from Wanda McGlamery that the Santa Punchie was from her, but it originated with Heather Summers. So there is the links to her site. Thanks Wanda!

If you are in the Port Alberni area, and want to join one of my classes, email me using the link on the top of the left sidebar. Thanks so much, have a super day. I know I will..........

................................... Glenda Mollet ..........

Saturday, October 3, 2009

Shimmer Paints

I am having a technique class this month for the Shimmer Paints. I will be doing 5 ways to use the Shimmer Paint, and each participant will go home with a bottle of Frost White Shimmer Paint of their very own. If you live in Port Alberni, BC Canada, and want to join my class, just email me!
I cased this first card from Andrea Walford. It uses my all time favourite (and very first Stampin' Up! stamp set) stamp set Lovely As A Tree.
Other supplies:
Whisper White cardstock, Not Quite Navy classic ink pad, silver cord, sponge, top note die, acetate.


Then I wanted to use the same colours and stamp set and try the Shimmer Mist technique.

Here is how I made this card:
1. I mixed the rubbing alcohol (99%) and Platinum Shimmer Paint - 2 oz. of rubbing alcohol and 6 drops of Shimmer Paint.
2. Cut a card from Not Quite Navy carstock - 5 1/2 x 8 1/2 "
3. Using my Shimmer Mist created in #1 above, I spritzed the entire front of the card and let it dry
4. Cut a Top Note die template from acetate
5. Using dotto I adhered the card onto scrap paper, then I adhered the acetate template to the scrap paper overtop of the card front.
6. Using a sponge and Not Quite Navy classic pad, sponge around the outside of the top note template
7. Then I applied the Platinum Shimmer Paint direct to the Lovely As A Tree stamp
8. Stamp the trees onto the top portion of the cardfront
9. I applied the Platinum Shimmer Paint direct to the sentiment and stamped it in the lower right hand corner of the cardfront
10. Using my Stamp-A-Ma-Jig I stamped the sentiment again with Basic Black classic ink


I am in Tofino again, the weather here is beyond awesome. We were walking on Long Beach yesterday in shirtsleeves. Then this am we walked on Mackenzie beach in shirtsleeves again. I can't remember it being this mild at this time of the year EVER!! Here is are some quick pictures of the view outside our trailer window.......


Well that's it for today, off to the beach again............
See you soon In My Craft Room................... Glenda Mollet

LinkWithin

Related Posts with Thumbnails