Showing posts with label Occasions Mini 2010. Show all posts

Tuesday, March 30, 2010

Abundant Hope

I made this card up a few days ago and I am just getting around to posting it.  I saw a similar card on Nancy Dawson's blog HERE and couldn't wait to make it.  I added a few twists of my own.
I used the Abundant Hope set from the soon to be retiring Occasions Mini catalogue.  Oh will I be sad to see some of these wonderful sets, papers, brads, etc go!!! 
Here is the picture of my card..........

I used the Embossing Frame technique, then dotted flower centers with Summer Sun, then the random dots with Mellow Moss to make them simulate leaves.  I coloured the flower image in using the markers with a bit of shading.  Here's the recipe:

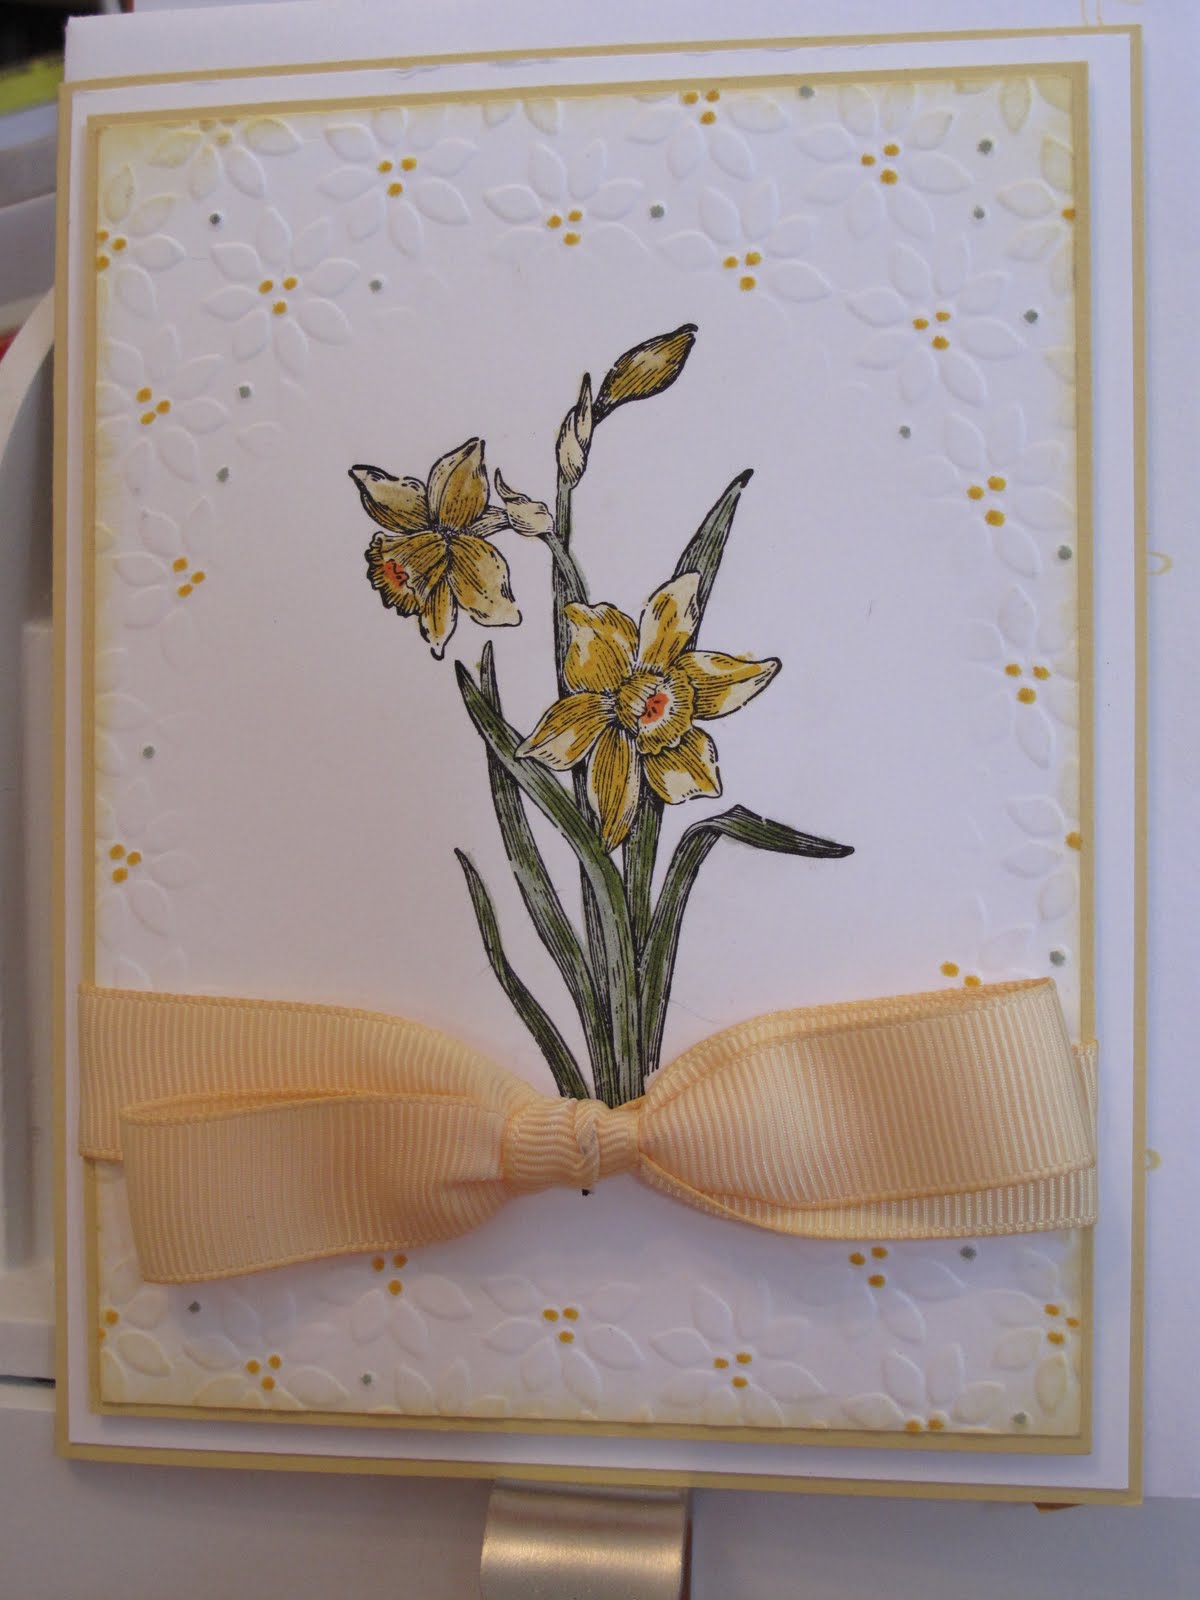
Stamp:  Abundant Hope
Ink:  Barely Banana, Basic Black
Markers:  Barely Banana, Summer Sun, Mellow Moss, Old Olive, Only Orange
Cardstock:  Whisper White, Barely Banana
Other:  Big Shot, Petals A Plenty Impressions Folder, Apricot Appeal GG Ribbon (retired)

This was a fun card and it showcases my "Stamp Of The Month" for April with is Abundant Hope.  Thanks for taking time to visit my blog today, I appreciate it. And thanks to all of you who leave a comment, I don't tend to answer each and every one of you, but please know that I read them all, and cherish the thought that you take time out of your busy days / evenings / nights to leave a comment.  Blessings and Hugs to all!!

Glenda Mollet

Tuesday, February 23, 2010

Ruby Red I {heart} Hearts card

This one was inspired and partly cased from Carol'Anne a truly amazing stamper. She shares the most amazing tutorials almost every day. Anyways, here's my card:

I used a non SU embossing folder to texturize the Ruby Red layer. You can't see it, but there is actually a piece of Basic Black Satin ribbon running along the black border piece over top of the Ruby Red section. I wanted to showcase some of the new SAB and Mini Catalogue items and this is the second card for my Stamp-Of-The-Month club. My SOTM for February is the I{heart} Heart set. Stampin' Up! is donating $2.00 from each stamp set sold to the Haitian Relief Fund. So I decided, I would donate 10% of the stamps price to the Haitian Relief Fund (Canadian Red Cross) for each of these stamp sets I sold this month. I am also having a FREE class for anyone who purchased this stamp set from me.
I used:
Stamps: I {heart} Hearts, Whimsical Words
Ink: Basic Black, Ruby Red
Cardstock: Basic Black, Creamy Caramel, Very Vanilla, Ruby Red
Other: Scallop Trim Border and Corner punches, Heart To Heart punch, Full Heart punch, Small Heart punch, non SU embossing folder, Basic Black satin ribbon
I wanted the medium stamped hearts to stand out a bit on the creamy caramel piece so I ran the basic gray marker around the outside of both of the hearts after they were punched out. It worked! I was so pleased. The small ruby red heart (from the Heart To Heart punch) is layered on a black heart punched from the Small Heart punch and they are popped up ontop of the fancy heart with a dimensional.
Off now to bed for the night. Tomorrow is my Monthly Punchie Class, the Baby Bunting and the Mermaid. Should be a fun filled day of Stampin', Chocolate, Laughter and Friendship. Ah what a wonderful life!!!! Glenda Mollet

Monday, February 22, 2010

Cottage Wall Friend Card

Sometimes I feel like the rabbit in Alice In Wonderland, always late and rushing to catch up! Ah, but don't you just love it when you get a project or two done on time? My day was fabulous, and I hope yours was as well. We had our 8th straight day of sunshine in Port Alberni, Vancouver Island, BC, Canada. If any of you have ever been to our part of the world in the winter, you will know what an absolute rarity this is for us. From the beginning of November to the end of March each year we usually get fog, fog and more fog between the rain storms. This year is phenomenally different! I love the sunshine, and each day we get it is a gift from above.
Today I was prepping and creating for classes. This is one of the cards I came up with. The other one will be posted tomorrow (it is a cased one). This one, as far as I know, is an original.

I used Cottage Wall Designer Series Paper mainly to create this card, with a few embellies and some cardstock. No techniques or anything too difficult. Just a quick, easy, fun card to make. Here's a list of supplies I used:
Stamps: Sweetheart, I {heart} Hearts
Ink: Old Olive, Orchid Opulence
Paper: Cottage Wall DSP
Cardstock: Old Olive, Rich Razzleberry, Orchid Opulence, Whisper White
Other: Chocolate Chip Sending Love Brad, Daisies Die, Circles #2 Die, Whisper White Satin ribbon
Come back tomorrow for my second card using I {heart} Heart stamp set..............
................ Glenda Mollet

Saturday, February 13, 2010

Valentine's Goodies

This post has pictures of the Valentine's Day goodies I made for our children and their families. The idea for the first one came through Patty Bennett and it uses the Fancy Favor Die. It is supposed to use the Heart Shaped Sweet Treat Cups, but the chocolate Lindt hearts don't fit in the heart shaped ones, so I had to use the round ones.


The first set uses Sending Love Specialty DSP, the second set uses Flock Together DSP. I just love the new satin ribbons from the Occasions Mini catalogue. This one uses the Real Red ribbon. Of course I did not find out that the chocolate hearts don't fit into the heart sweet treat cups until after I punched the holes in the pouch, so I had to fit some circles around the round treat cups to hide the little bits of the punched heart that was left after I punched the 1-3/4" circle over top. Oh well, they turned out ok! I used some non SU brads from my stash.

This is the box of treats I made for the most important little boy in the world, our Grandson, James! We had the blessing to have him for the day on Friday. He is at that cheeky impish almost 2 yr old stage. He loves to tease, play hide-and-seek and tromping through mud puddles (which there was a plethora of yesterday, let me tell you!). Oh what a treasure he is, we had such a fabulous time with him. This box uses the Box#2 die for the Big Shot. I decorated it simply with some punched out hearts. The embellishment on the right hand side is a piece of leftover Sending Love Sp. DSP I cut out, then I added some punched hearts using the new Small Heart punch and some paper from Welcome Neighbour DSP from the SAB brochure. I added a non SU flocked heart brad in the middle. Its simple, but he is more interested in what is inside, than outside!!! The cardstock is Real Red.


Thanks for looking, have a great day!........... Glenda Mollet

Thursday, February 4, 2010

Passionate Valentines Card

Ever since Ilina posted her card (link HERE) with this technique, I knew I was destined to make a card along these lines. This is my version of that card. The front and the inside:


This card is easy and fun to make. I used the Heart-To-Heart punch and punched the Basic Black card twice on the front. Then I used the new Small Heart punch and added a few extra hearts. Then I used my White Signo Gel pen to put dots around one of the punched out hearts. A pice of Pink Passion cardstock was put behind the punched out section. I ran a piece of Pink Passion cardstock thru my Big Shot using a non SU embossing folder, then punched that out with the Full Heart Punch. One of the black punched out hearts was popped up on one side of that heart then the whole thing was popped up on the card front. a Wide Oval Very Vanilla piece was stamped with the "love you much" sentiment from Well Scripted.
Inside I punched a piece of Pink Passion cardstock with the new Pinking Hearts border punch. The Very Vanilla piece inside is first punched with the Heart-to-Heart punch, then layered onto the Pink Passion piece. I added 3 of the punched out black hearts from the front and stamped the sentiment (from Happy Together set) in Basic Black and coloured the heart with my Pink Passion Stampin' Write marker. I also ran the envelope through with the same non SU embossing folder, then added some more of the black punched out hearts onto it.
Well, there you go. Quick and easy. I think this one took me about 10 minutes to make, start to finish.
Off now to get ready for my class this afternoon. Oh yeah! Forgot to tell you...... Our local cable television station is coming this afternoon to do a profile on me, tape some of my class, and interview some of my stampers! How cool is that!!!!
~~~~~~~~~~~~ Bye for now, Glenda Mollet

Sunday, January 31, 2010

Garden From The Heart Wiper Card

Another weekend creation. This is my first attempt at a wiper card (tutorial HERE at SCS). The finished size of this card is quite large, I was lucky to have an envelope to fit it. The other day a friend, Peggy, dropped by with some spare envelopes and there was one the perfect size in that box. Thanks Peggy!!!
I followed the tutorial and used that size then I added my own papers and embellishments. I loosely followed the Mojo Monday sketch for week 123 (link HERE). Here's my card:
and here's the card open:

and here is the back:

I made this with one of the new stamp sets available in the Occasions Mini catalogue - Garden From The Heart. I love this set, it's very versatile.
I stamped the hanging herbs in a continuing line (so much easier now that the stamps can be ordered in Clear Mount) at the tope of the white section. Both of the hats were stamped in Basic Black then coloured with Stampin' Write markers and cut out. The underneath one on the left is adhered flat on the WW piece, and the left hand one is popped up on dimensionals. I used some new Old Olive Satin Ribbon , a Filigree Brad, and a Black Brad for the embellishmet on the left. I threaded the ribbon through the Filigree Brad after attaching the black brad to it. The sentiment is also from the same set and is stamped in Basic Black. The bird is coloured with Bashful Blue and Brocade Blue, then I punched it out with the curly label punch. I wanted to highlight the frame a bit more, so I just used the side of the Black Marker and ran a thick line around it up to the fram that was stamped (I hope that makes sense to you!).
Here's the complete list of ingredients:
Stamps: Garden From The Heart, On Your Birthday, Pocket Silhouettes
Ink: Basic Black, Old Olive, Melon Mambo
Markers: Pale Plum, Melon Mambo, Old Olive, Always Artichoke, Lavender Lace, Yoyo Yellow, Bashful Blue, Brocade Blue, Basic Black
Paper: Razzleberry Lemondade DSP
Cardstock: Whisper White, Basic Black,
Other: Curly Label Punch, dimensionals, Filigree Brad, Black Brad, Old Olive Satin Ribbon
Thanks for looking, off now to have dinner with DH, then get some ideas for make-n-takes for my open house and a Home Based Business Fair I am invited to participate in..................
************** Glenda Mollet

Thursday, January 28, 2010

Two-Step Bird Punch Card

Today I was inspired by two awesome stampers. First Gretchen (HERE is her link) - and the 3 levels of cards she does her "Takin' It To The Top Tuesday". And Darlene (HERE is her link) - and a card she made. Thanks for your inspiration Ladies.
I did the three "good", "better", "best" steps to these cards. First I started with a basic card:

This one is plain, has no sponging or spritzing on it at all. I did put some faux thread in the buttons. To make it I used:
Paper: Sweet Pea Designer Series Paper
Cardstock: Pretty In Pink, Rose Red, Old Olive, Whisper White
Punches: 2 Step Bird, Modern Label, Word Window
Other: Pretty In Pink Satin Ribbon, Playground Designer Buttons
For the second one I sponged around the DSP, added some spritzing colour on the Whisper White piece behind the bird using the Colour Spritzer Tool (page 192 of the IBC). I spritzed on Pretty In Pink marker ink, then some Rose Red, all over. I spritzed Bashful Blue ink on the top half and Old Olive on the bottom half. I upgraded the buttons as well.

For this one I used:
Paper: Sweet Pea DSP
Cardstock: Pretty In Pink, Rose Red, Old Olive, Whisper White
Punches: 2 Step Bird, Modern Label, Word Window
Ink: Regal Rose
Markers: Pretty In Pink, Rose Red, Bashful Blue, Old Olive
Other: Pretty In Pink Satin Ribbon, Colour Spritzer Tool, Filigree Brads, Rich Regals Brad, white brad (non SU), sponge
Then I did version #3 - the Over The Top one:
For this one I did some brayering on the Whisper White piece behind the bird, it still has sponging around the DSP. The flower on the right hand side is hand made. I made the same type of flower for the Twist Top Box I made in THIS post. I punched two of the big flowers from the Boho Blossom Punch, ran them through the crimper about 5 times, turning them each time. Then I sponged Rose Red ink on the outsides. I shaped the layers, and glued them together with Tombow glue. Then I sponged some Rose Red ink around the outside of the Pretty In Pink Corderoy Button and adhered it to the center of the flower with a glue dot. Each of the birds has a black dot for an eye for which I used the Basic Black Stampin' Write marker. The rest of supplies are the same as for the other cards. Here are pictures of the button embellishments up close:
and this is what the inside looks like:
I plan on using the first version as a demo for Home Workshops, and have the other two on hand to show what you can do with the same basic card. Thanks ever so much for taking the time out of your busy lives to visit my blog. I appreciate it!..............Glenda Mollet

LinkWithin

Related Posts with Thumbnails