Monday, May 30, 2016

Envelope Punch Board PIcnic Basket

Hello everyone!

On Saturday I got together with over 30 local demonstrators for a day of fun and stamping.

We do some business stuff, we had a few fun games, then we have a pot luck lunch.  Oh my, was it good!!!  Then in the afternoon we do some Make 'n Takes.  This time I showed them how to make a Picnic Basket using the Envelope Punch Board.

I found a video tutorial by Linda Parker on how to make this cute basket.  Here is what my finished project looks like .....


I used Melon Mambo and Whisper White to create my basket.  It sure will fit a lot of chocolates!

I hope you get a chance to create one soon.  If so, I would love to see it.  EMAIL ME a picture of it.

Have a crafty day!  Glenda Mollet

Friday, May 27, 2016

Video Thursday - Mini Treat Bag by Stampin' Up!

Hello Everyone!

One of the products that is not retiring from the Stampin' Up! Annual Catalogue, is the Mini Treat Bag dies.
I chose a video on these dies to share with you today.


These bags are so great for gift giving, or as an envelope for a quick card.  The set comes with lots of dies and will still be available when the new 2016-17 Stampin' Up! Annual Catalogue.

Here is a picture of what the die set looks like.  You can click on it to go to my online store for more details, or to order your set now.

http://www.stampinup.com/ECWeb/ProductDetails.aspx?productID=137547&dbwsdemoid=2028928

Or EMAIL ME in Canada and I would be happy to place your order for you.

Have a crafty day!   Glenda Mollet

Thursday, May 26, 2016

Masculine May Card Share - The Open Sea

Hello Everyone!

I am so very sad to see two of my favourite stamp sets retiring, so I had to get one more card in using the World Map background stamp and The Open Sea stamp set.


I found this one on a blog called invisiblepinkcards but there was no name I could find on the blog to identify the stamper.  Thank you who ever you are, I love this card.  Don't you???

Sometimes I love to do collagy type cards and this one works very well and leaves a lot of white space around it.

We made a mask out of copy paper by cutting out the center and leaving a 3/4" border all around
First, stamp the ship in early espresso ink
Create a mask for it out of a post-it note and put it over top of the ship
Put the mask on the very vanilla piece
Then stamp the World Map in Early Espresso ink
Remove the mask from the ship (which is under neath the large front mask)
Replace the front mask and sponge in the square hole in the middle using Soft Suede ink
Remove the mask and stamp the small dots from Gorgeous Grunge in Early Espresso ink
Ink up the large blobs from Gorgeous Grunge and stamp them off on scrap paper before stamping on the card front
I coloured 3 Perfect White Dots using a bronze sharpie and attached them
The happy birthday is inked in Cherry Cobbler and stamped on a separate piece of Very Vanilla cardstock
I punched the left edge with the Banner Punch (also retiring) and adhered it with dimensionals
The last thing is to sponge around the outside of this piece with Soft Suede ink and put it onto a Very Vanilla card base

Not much time left now to order Retiring Items from Stampin' Up!  On May 31st some really great products will be disappearing forever.  EMAIL ME if I can help you place an order if you live in Canada and don't already have a Demonstrator.

Have a crafty day!   Glenda Mollet

Wednesday, May 25, 2016

Masculine May Card Share - Guy Greetings

Hello Everyone!

Another card from my May Masculine Stamp-A-Stack class is this one made using Guy Greetings and the Hardwood background stamp .....


It was inspired by a card I found on Pinterest that did not have a name on it.

We stamped the Hardwood onto Sahara Sand cardstock using Early Espresso ink
Then we stamped the car from Guy Greetings onto Whisper White cardstock using Soft Suede ink
Under this we stamped the Happy Birthday using Always Artichoke ink
The window frame was cut out of Early Espresso cardstock and the car is flat behind this
Then the two pieces are popped up on dimensionals on top of the Hardwood
The banner behind the numbers was stamped in Early Espresso ink onto a piece of Whisper White cardstock
Then we sponged this piece with Sahara Sand and cut it out with the die from Large Number Dies
This was popped up on dimensionals
The numbers were cut out of Always Artichoke using the Large Number Dies and attached flat onto the banner

A quick and easy masculine card that can be customized to whatever year you require.

I would love to be your Demonstrator in Canada, if you don't already have one.
EMAIL ME and we can get the supplies for this card ordered for you.
You are also welcome to attend my classes, or request card kits by mail.

Have a crafty day!   Glenda Mollet

Tuesday, May 24, 2016

Hello Tuesday!

Hello Everyone!

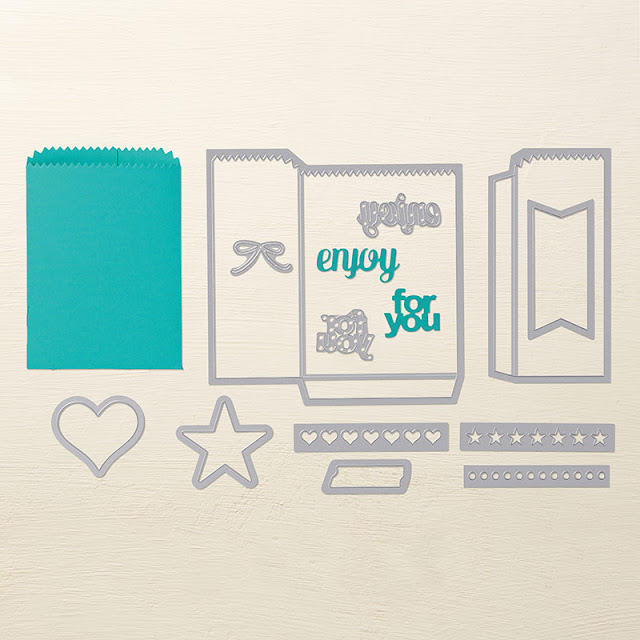
Ever had one of those weekends when you just tread water and get nothing done?  Well, the past weekend was not like that for me!  I am busy creating projects with products from the new Stampin' Up! Annual Catalogue.  I am having a New Catalogue Tea Party on Tues May 31st (that's only a week away), and there will be displays of some of the new stamps, punches, dies and designer papers.

There will be Door Prizes and a make 'n take for you to complete.  And, since it's a Tea Party, there will also be goodies and refreshments for you to indulge in as you touch, feel and look at your very own copy of the new Stampin' Up! Annual Catalogue!!!

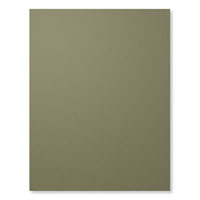
Here's the front cover of the new catalogue .....


The new In Colours (available from Jun 1 2016 to May 31 2018) are so much fun to play with.

And a look at the new In Colours -


From the top right - Dapper Denim, Emerald Envy, Flirty Flamingo, Peek A Boo Peach and Sweet Sugarplum.

I would love for you to come to my Tea Party, just EMAIL ME and I can give you directions.

Also, from June 1 to 30 Stampin' Up! is adding an extra $40 in Stampin' Rewards to any order / party order of $4000 or more.  I still have a couple of dates available in June for you to book your Party.  You can hold it in my studio so the mess and fuss is all here.  You bring the stampers and goodies and I provide everything else - including adhesives.  Don't wait too long, or the dates will be booked up.

Can't make it here to do a party?  Do an Virtual Party or Online Party.  I will set up a Host Code for you, and you encourage family / friends to place an order using the Host Code.  You will get all the Stampin' Rewards, including the extra $40 with a qualifying party order.  EMAIL ME right away to book yours!!

Have a crafty day!  Glenda Mollet


Monday, May 23, 2016

Happy Home Card Share

Hello Everyone!

One of the stamp sets that is retiring in just a week is the Happy Home stamp set by Stampin' Up!  This set has scenery stamps that you can use separately or together to create great cards.


To create this card I used the Stamp-A-Ma-Jig (SAMJ) which is a tool you can use to place your stamp in exactly the right spot every time.  This stamp set is rubber so you can't see through it for placement, the SAMJ works great for this.

First I stamped the tree image, then using the SAMJ I stamped the boy flying the kite.  Once they were stamped, then I could colour the background.  I sponged some Old Olive on the bottom for the grass, added a small and light strip of Pink Pirouette along the ground line in the sky area for contrast, then sponged the sky with Soft Sky.  A bit of Pool Party around the top edge finished it off.  This is a quick and easy card but looks like you spend a long time on it!

The base is Old Olive 8-1/2 x 5-1/2 scored in half and folded.  Then a strip of Wildflower Fields designer paper (retired from Sale-A-Bration) which is 1 x 4-1/4.  The piece where all the stamping happens is Whisper White 4-1/4 x 4.  A strip of Old Olve 1-1/4 x 4 is placed along the bottom with the sentiment stamped on it.  Then I wrapped a 5-1/2" piece of Old Olive cotton ribbon around these two pieces before adhering them to the card base.  I used the Pink Pirouette and Mint Macaron markers on the tree in a dabbing motion to add some blossoms, and coloured the rest of the images in with Stampin' Write Markers, any colour will do.  I used Marina Mist, Real Red, Pumpkin Pie, Crumb Cake and Daffodil Delight.

Have a crafty day!  Glenda Mollet

LinkWithin

Related Posts with Thumbnails