Hi Friends!
I got a little carried away on the weekend making cards using the Eclipse Technique. I created this one for my Dear Hubby who has been married to me for 41 years now. It was our anniversary recently so I wanted to do something special for him.
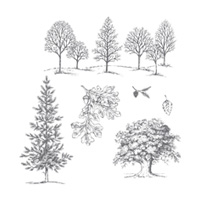
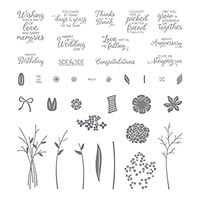
I reverted back to the very first stamp set I ever purchased from Stampin' Up! way back in 2007 - Lovely As A Tree. This set is the one that has been in the Stampin' Up! catalogue for the longest time, and Shelli Gardner the co-founder of Stampin' Up! has said it will never retire. I never get tired of using it I just love the images so much.
To do this very simple technique you first create your card front piece by doing all the stamping and everything else. Then you decide what word you want to put on it. I used the Large Letter dies by Stampin' Up! and 4 of them fit very nicely on a piece of 5 x 3-3/4" glossy paper. I will tell you how I did the background in a bit. Then you lay your piece on the Big Shot and space out the letters where you want them. After running it through and cutting out the letters, you attach this layer to the rest of your card. The letters L O V E were then returned to the holes the dies made using dimensionals to lift them up off the layer. It is such a cool technique, give it a try, and because the glossy paper is glimmeryish, you don't even need to add any more bling!
To make the background I used a piece of Stampin' Up! Glossy White cardstock and a baby wipe. First get some ink (I used Night of Navy) onto the inside of the cover of the ink pad. Swipe the baby wipe around picking up some of the ink and then swipe it onto your glossy cardstock. The baby wipe is damp and the glossy cardstock allows it to flow nicely back and forth and you have a bit of time to play with it and make it look as you like. I left some areas uncoloured so it looks like there are clouds in the sky. I used Old Olive ink to do the same thing on the bottom of the layer, then stamped Lovely As A Tree using Archival Basic Black ink (you need to use something permanent so it dries fast and stays on the glossy cardstock.
Let me know if you would like me to make a video of this card. I would be happy to! A list of supplies can be found under my signature. You can click on any of the images and go to my Canadian Online Store. Or CLICK HERE, you can place an online order and get all these amazing products. If you order online, please use the Host Code located at the top right of my blog. I will send you some card tutorials at the end of the month as a Thank You. Or you can EMAIL ME and I will be happy to help you place your order, or figure out what you would like to purchase.
Don't forget for only $135 you can join my Craft Room Stampers Team and get $165 in product plus some business supplies too. CLICK HERE to join my Team.
Have a Crafty Day!







I loved your card so much I had to case it today. It will be on my blog tomorrow. It is just so beautiful. Amazing how the coloring looks completely different on yours and mine. :)
ReplyDeleteMine will post after midnight tonight, which will be October 3rd, Arizona Time. I gave credit to you and a link to your blog.
Thank you so much!
Donna
Lovely card, my favorite stamp set too!
ReplyDeleteLove this card!! Just changed this one up a bit and made an Anniversary card for my husband of 39 years on Nov 10 :)
ReplyDeleteThank you for sharing.